
Custom lettering and designs are a great way to personalize your home or gifts. You can capture family quotes, mark significant dates or add humor and style to your decor. There are a number of techniques to letter or personalize, but today I want to talk about my two favorites.
Stencils are a girl’s best friend! You can purchase precut stencils at any craft store and use spray adhesive to secure them to the surface (this is far more effective than tape since it bonds the entire stencil to the surface). Then, using a semi-dry brush, apply paint over the stencil. I like to dip my brush into the paint and then dry it on a paper towel. Remove more paint than you think you should!
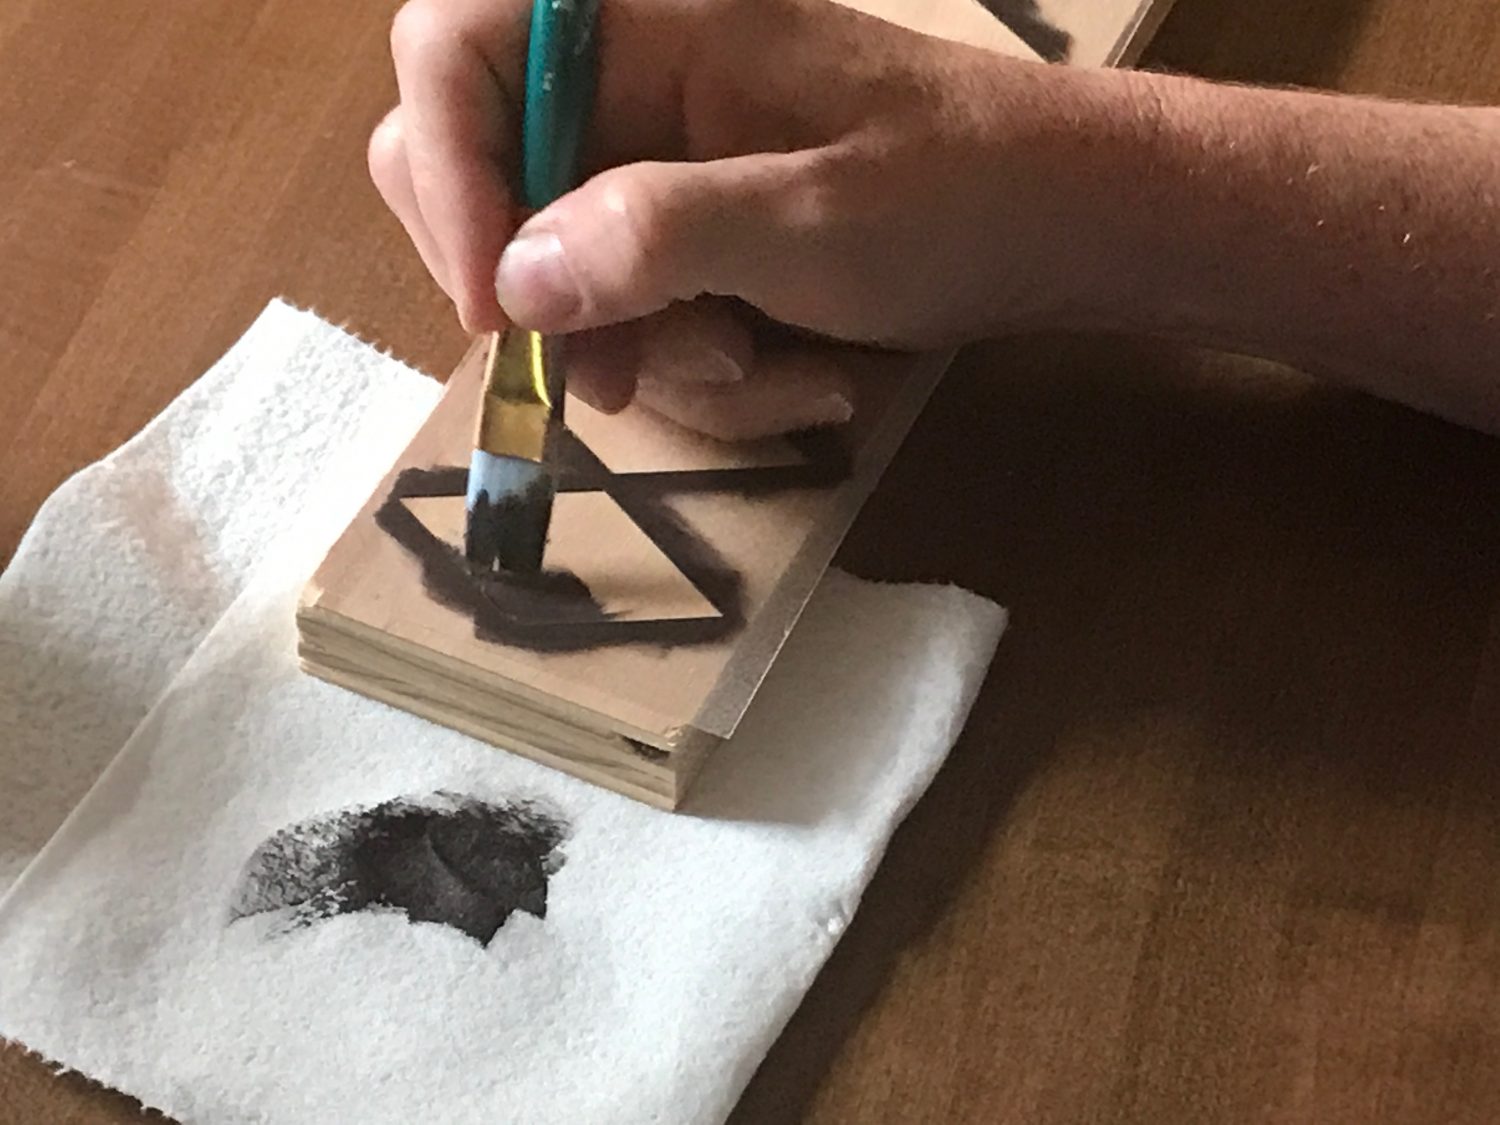
You can always add more, but once you apply too much paint to a stencil, it will bleed underneath and ruin your piece. Patience grasshopper!! Some people like to use a “pouncing” technique by applying the paint with a round, flat-bottom brush. I, however, prefer using just a flat brush.
Cricut or Silhouette machines are a great way to create your own stencils. These machines can be loaded with vinyl (self-adhesive) or acrylic sheets to create whatever you choose—literally. You can purchase designs, type in text or even import images off of the internet (naturally you need to be aware of copyright laws). Once the images are imported, the machine will cut out the stencil. Very cool! These stencils can then be applied to any smooth surface for painting, staining or even glass etching by using the same stenciling method discussed above.
The second method is what I consider “old school” and takes more time and patience (I know–I already told you to be patient with the method above. But this process does take time and practice, so don’t rush it. The rewards are totally worth it!). The benefit of this method is that it can be adapted to textured surfaces like reclaimed wood—which would otherwise allow paint to bleed into cracks and grooves under traditional stencils. This method involves creating the text or image on your computer and simply printing it out on plain paper. From there you just need some graphite transfer paper and a pen. Situate the image on the surface and trace the outline.
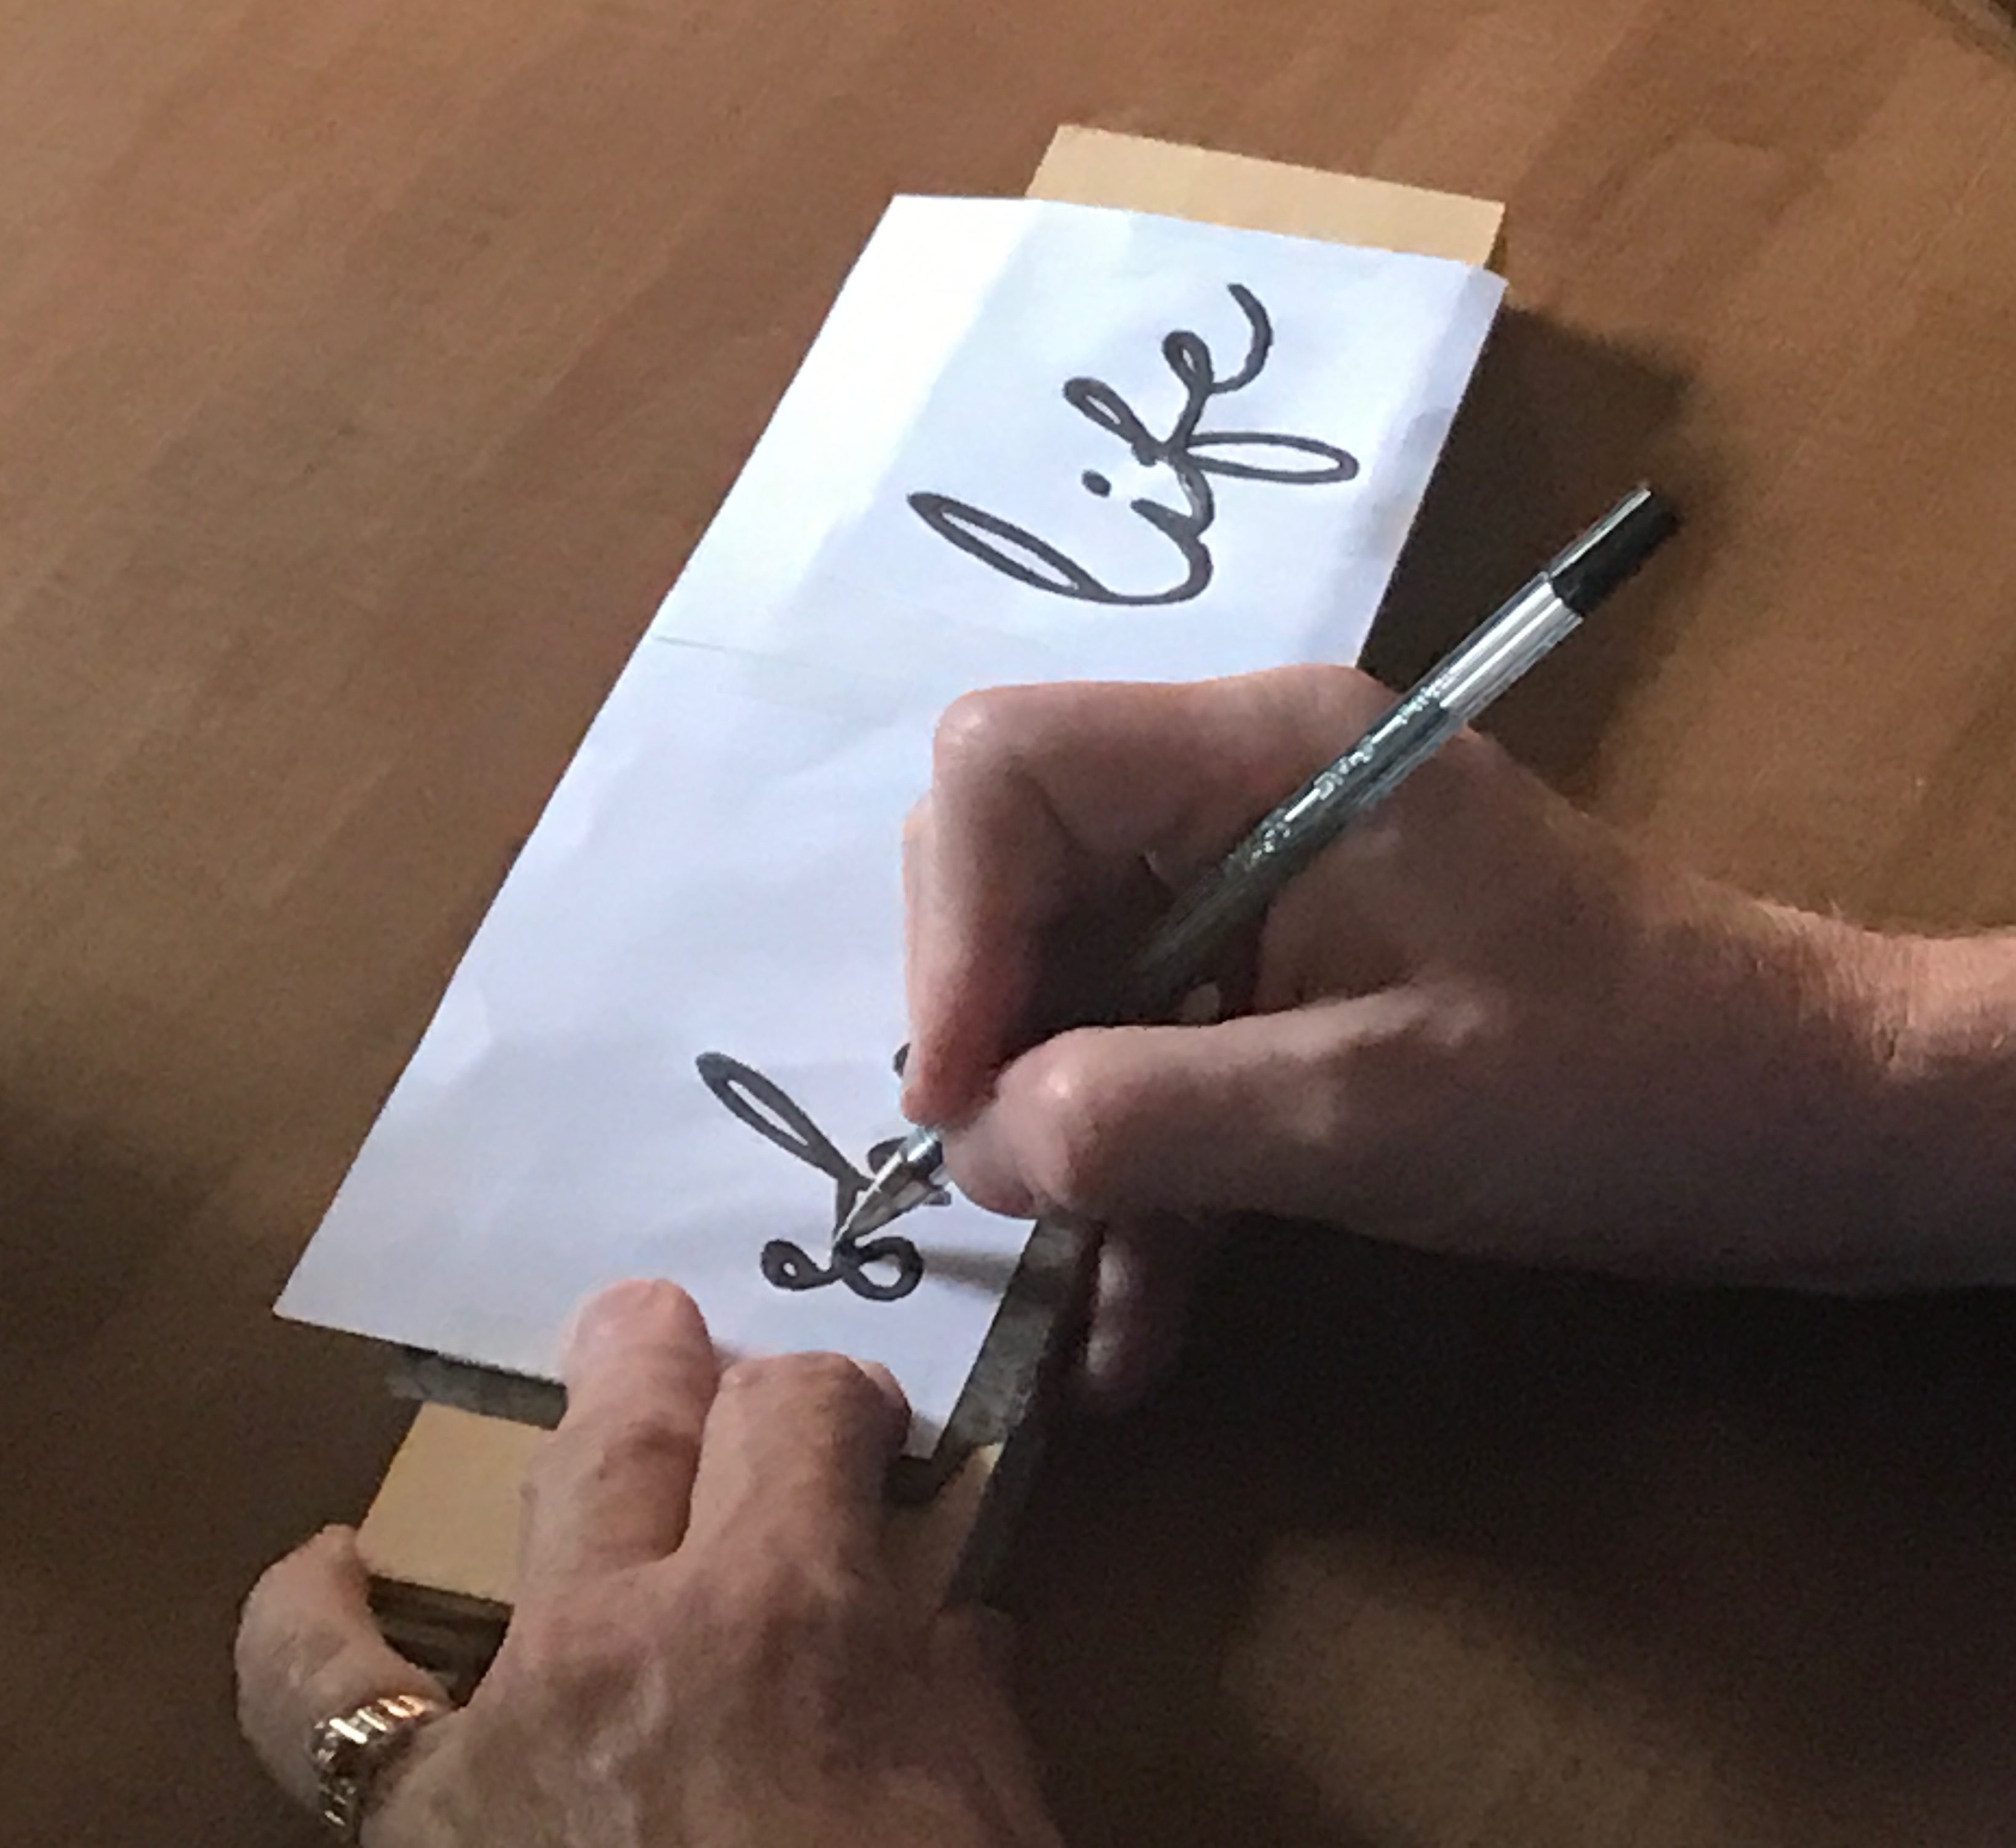
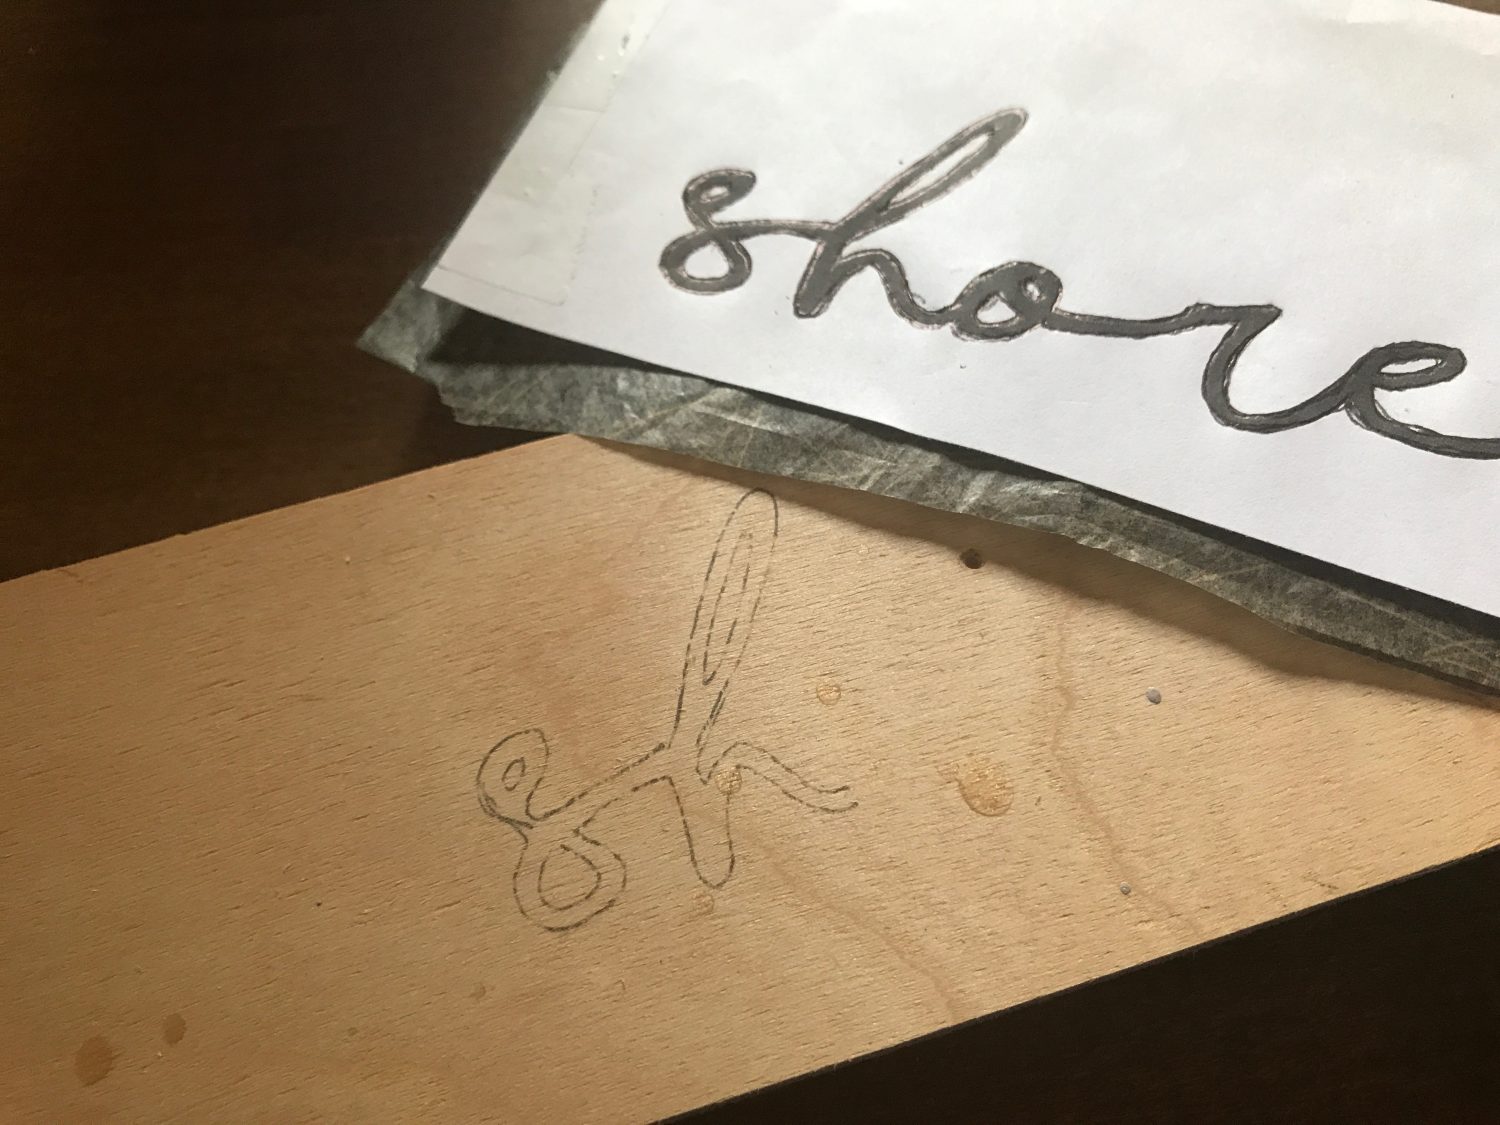
Once completed you can see a clear pattern to hand-paint. Select a small brush and again–go easy on the paint. You can always add more but removing a “blob” is much harder!
Think about trying your hand at one of these two methods to customize and personalize you home and gifts. It does take practice but is worth the effort. Your Christmas list awaits!!
Hold my wine, I’ve got this…
Amy
P.S. If you enjoy these posts, don’t forget to like and share! The more interaction we have, the more fun!