
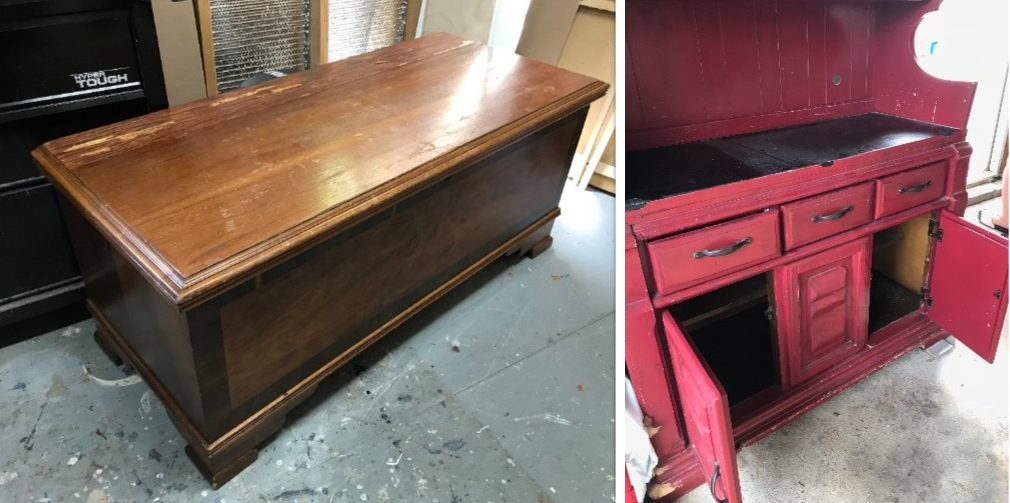
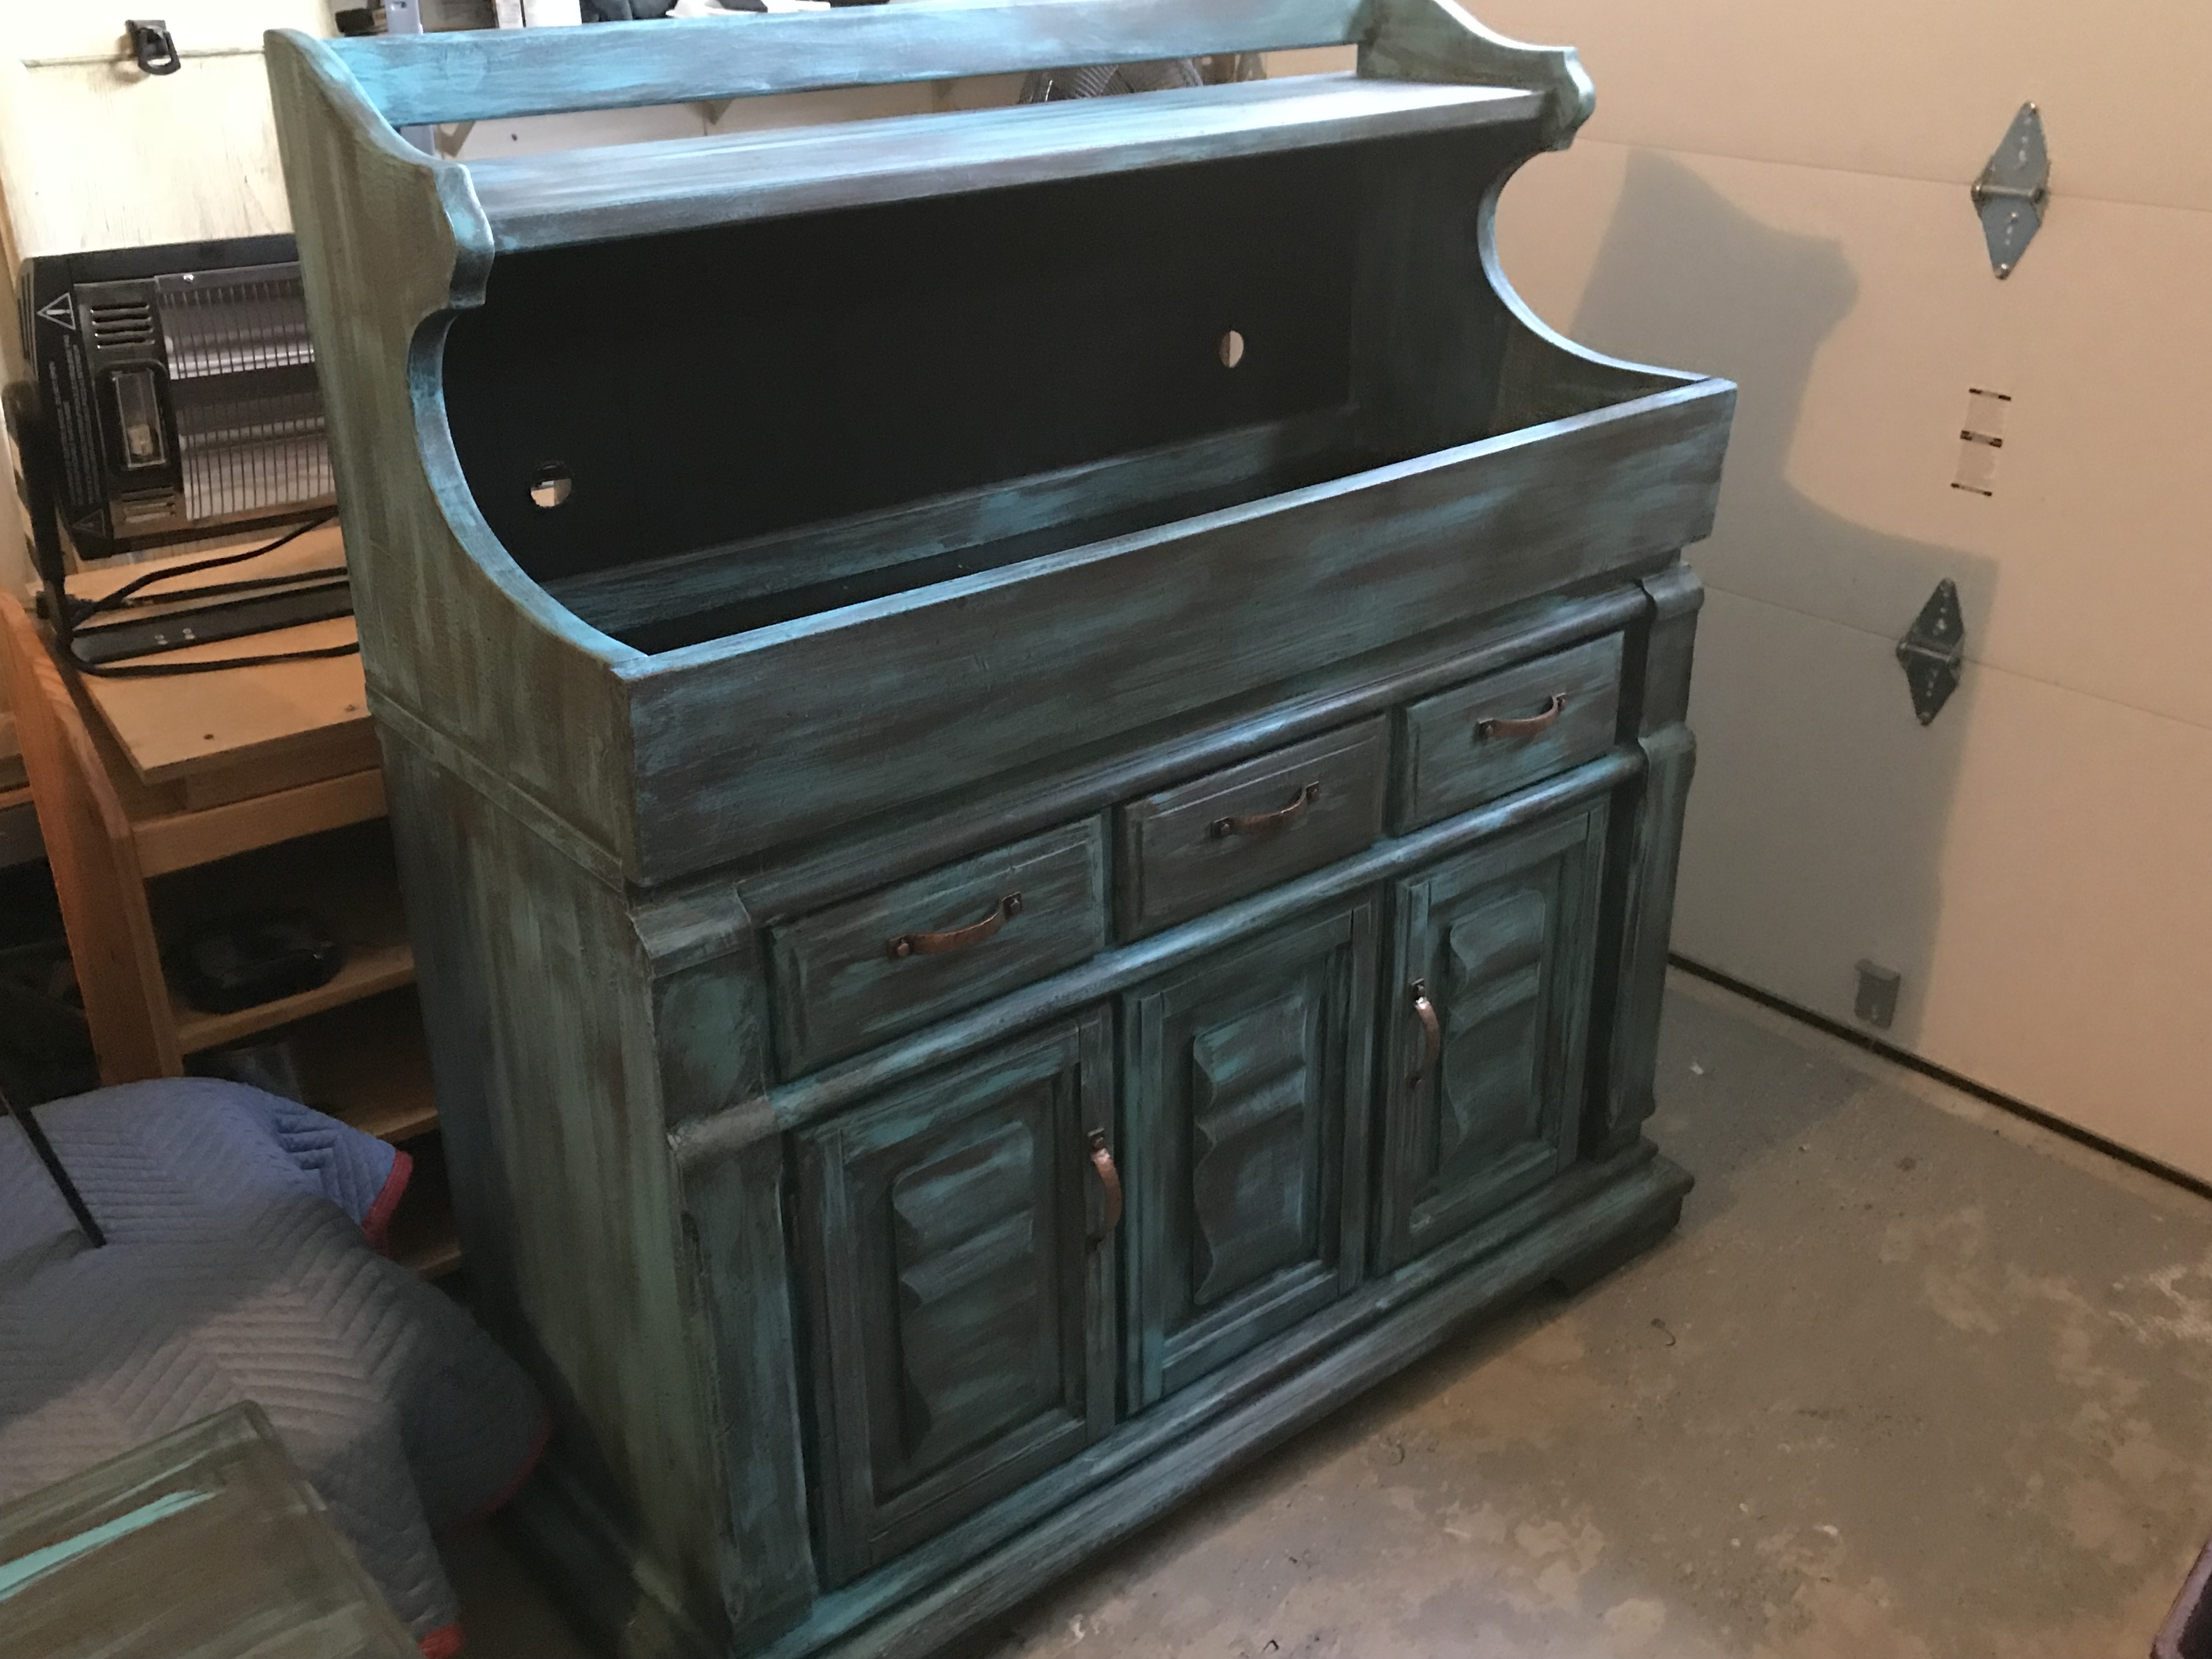
 I had the pleasure of refinishing a dry sink and cedar chest for a client recently. Both items had been in the family and held sentimental value. The dry sink had been painted red at some point over the years, and had also served as a teething block for some puppies along the way! It had some significant damage to the base of the unit. The client was looking to have it repainted for her living room and provided this bracelet as the color palette.
  After viewing some examples of the finish she was looking for, I had a vision for what I needed to do. She also asked me to refinish a cedar chest that would become a coffee table for the same room. She wanted it to look rustic and worn, and utilize the same color palette as the dry sink.
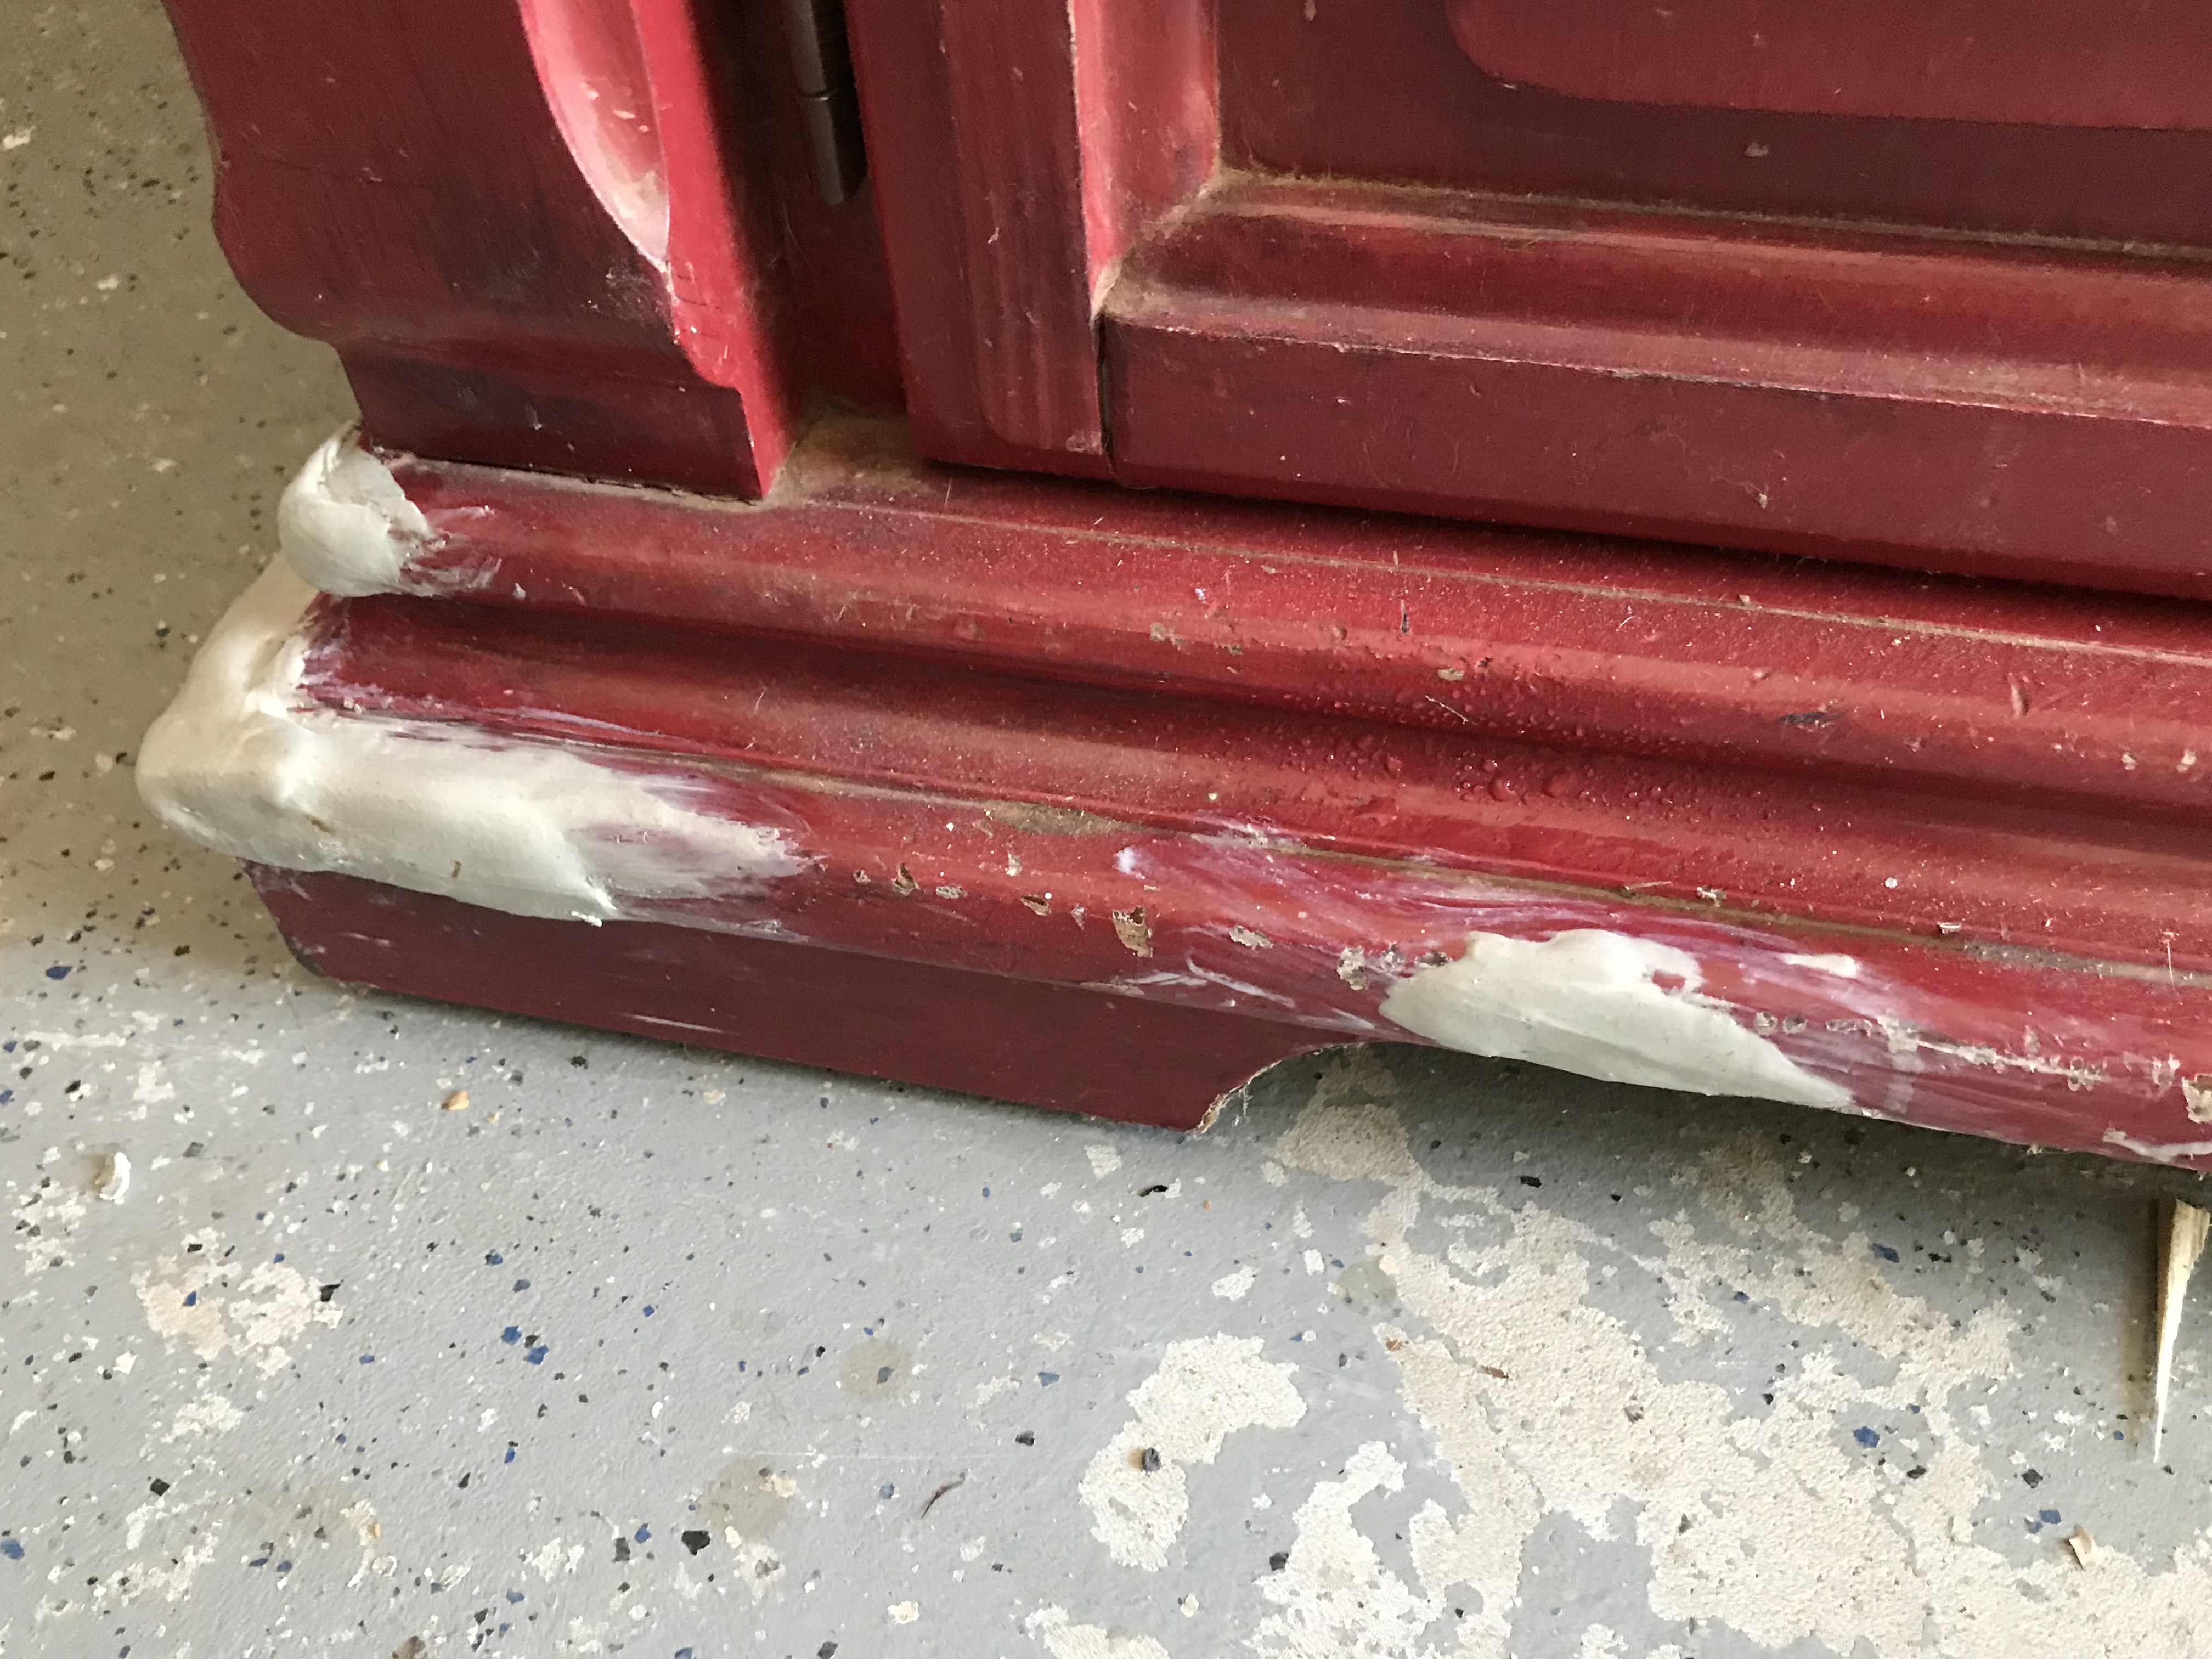
As with all projects, the first step is damage repair. I rebuilt the corners of the base with a combination of epoxy and wood filler. I also randomly filled large scratches and dings, while leaving a lot of the wear and tear alone so that it would show the character and patina from its history.
Next, since the red paint that had been used was latex and was sticky and rubbery, I sanded the areas where it was peeling away and applied a base coat of black flat paint. Then I started dry brushing in Benjamin Moore’s Cool Aqua. In this case, I use the word dry brushing loosely since I actually did have quite a bit of paint on the brush. I just painted it with consistent strokes to purposely not achieve full coverage. Next, to bring in the brown tones of the bracelet, I dry brushed Waverly’s Truffle on top of the aqua. Finally, I very sparingly added more aqua on top of the brown to give it a worn (rather than patchy) appearance. I sealed the entire piece in General Finishes Flat out Flat for a completely matte finish.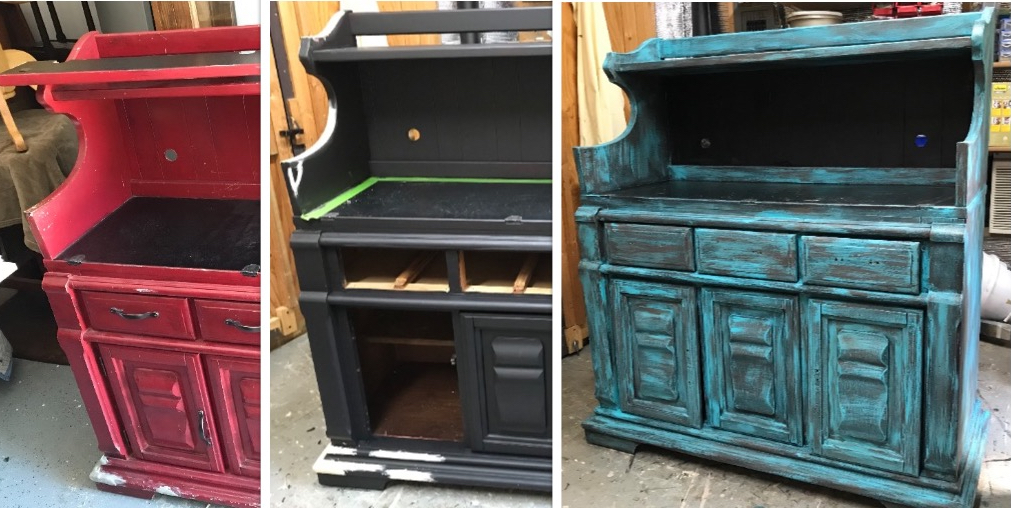
Since the finish was bold, I wanted to wait until I finished painting to select the drawer pulls. I actually took a drawer and door with me to the store. My original thought was rusted iron, but once I saw the copper pulls I was in love. I texted the client several options and silently hoped she would pick the copper. SHE DID!!!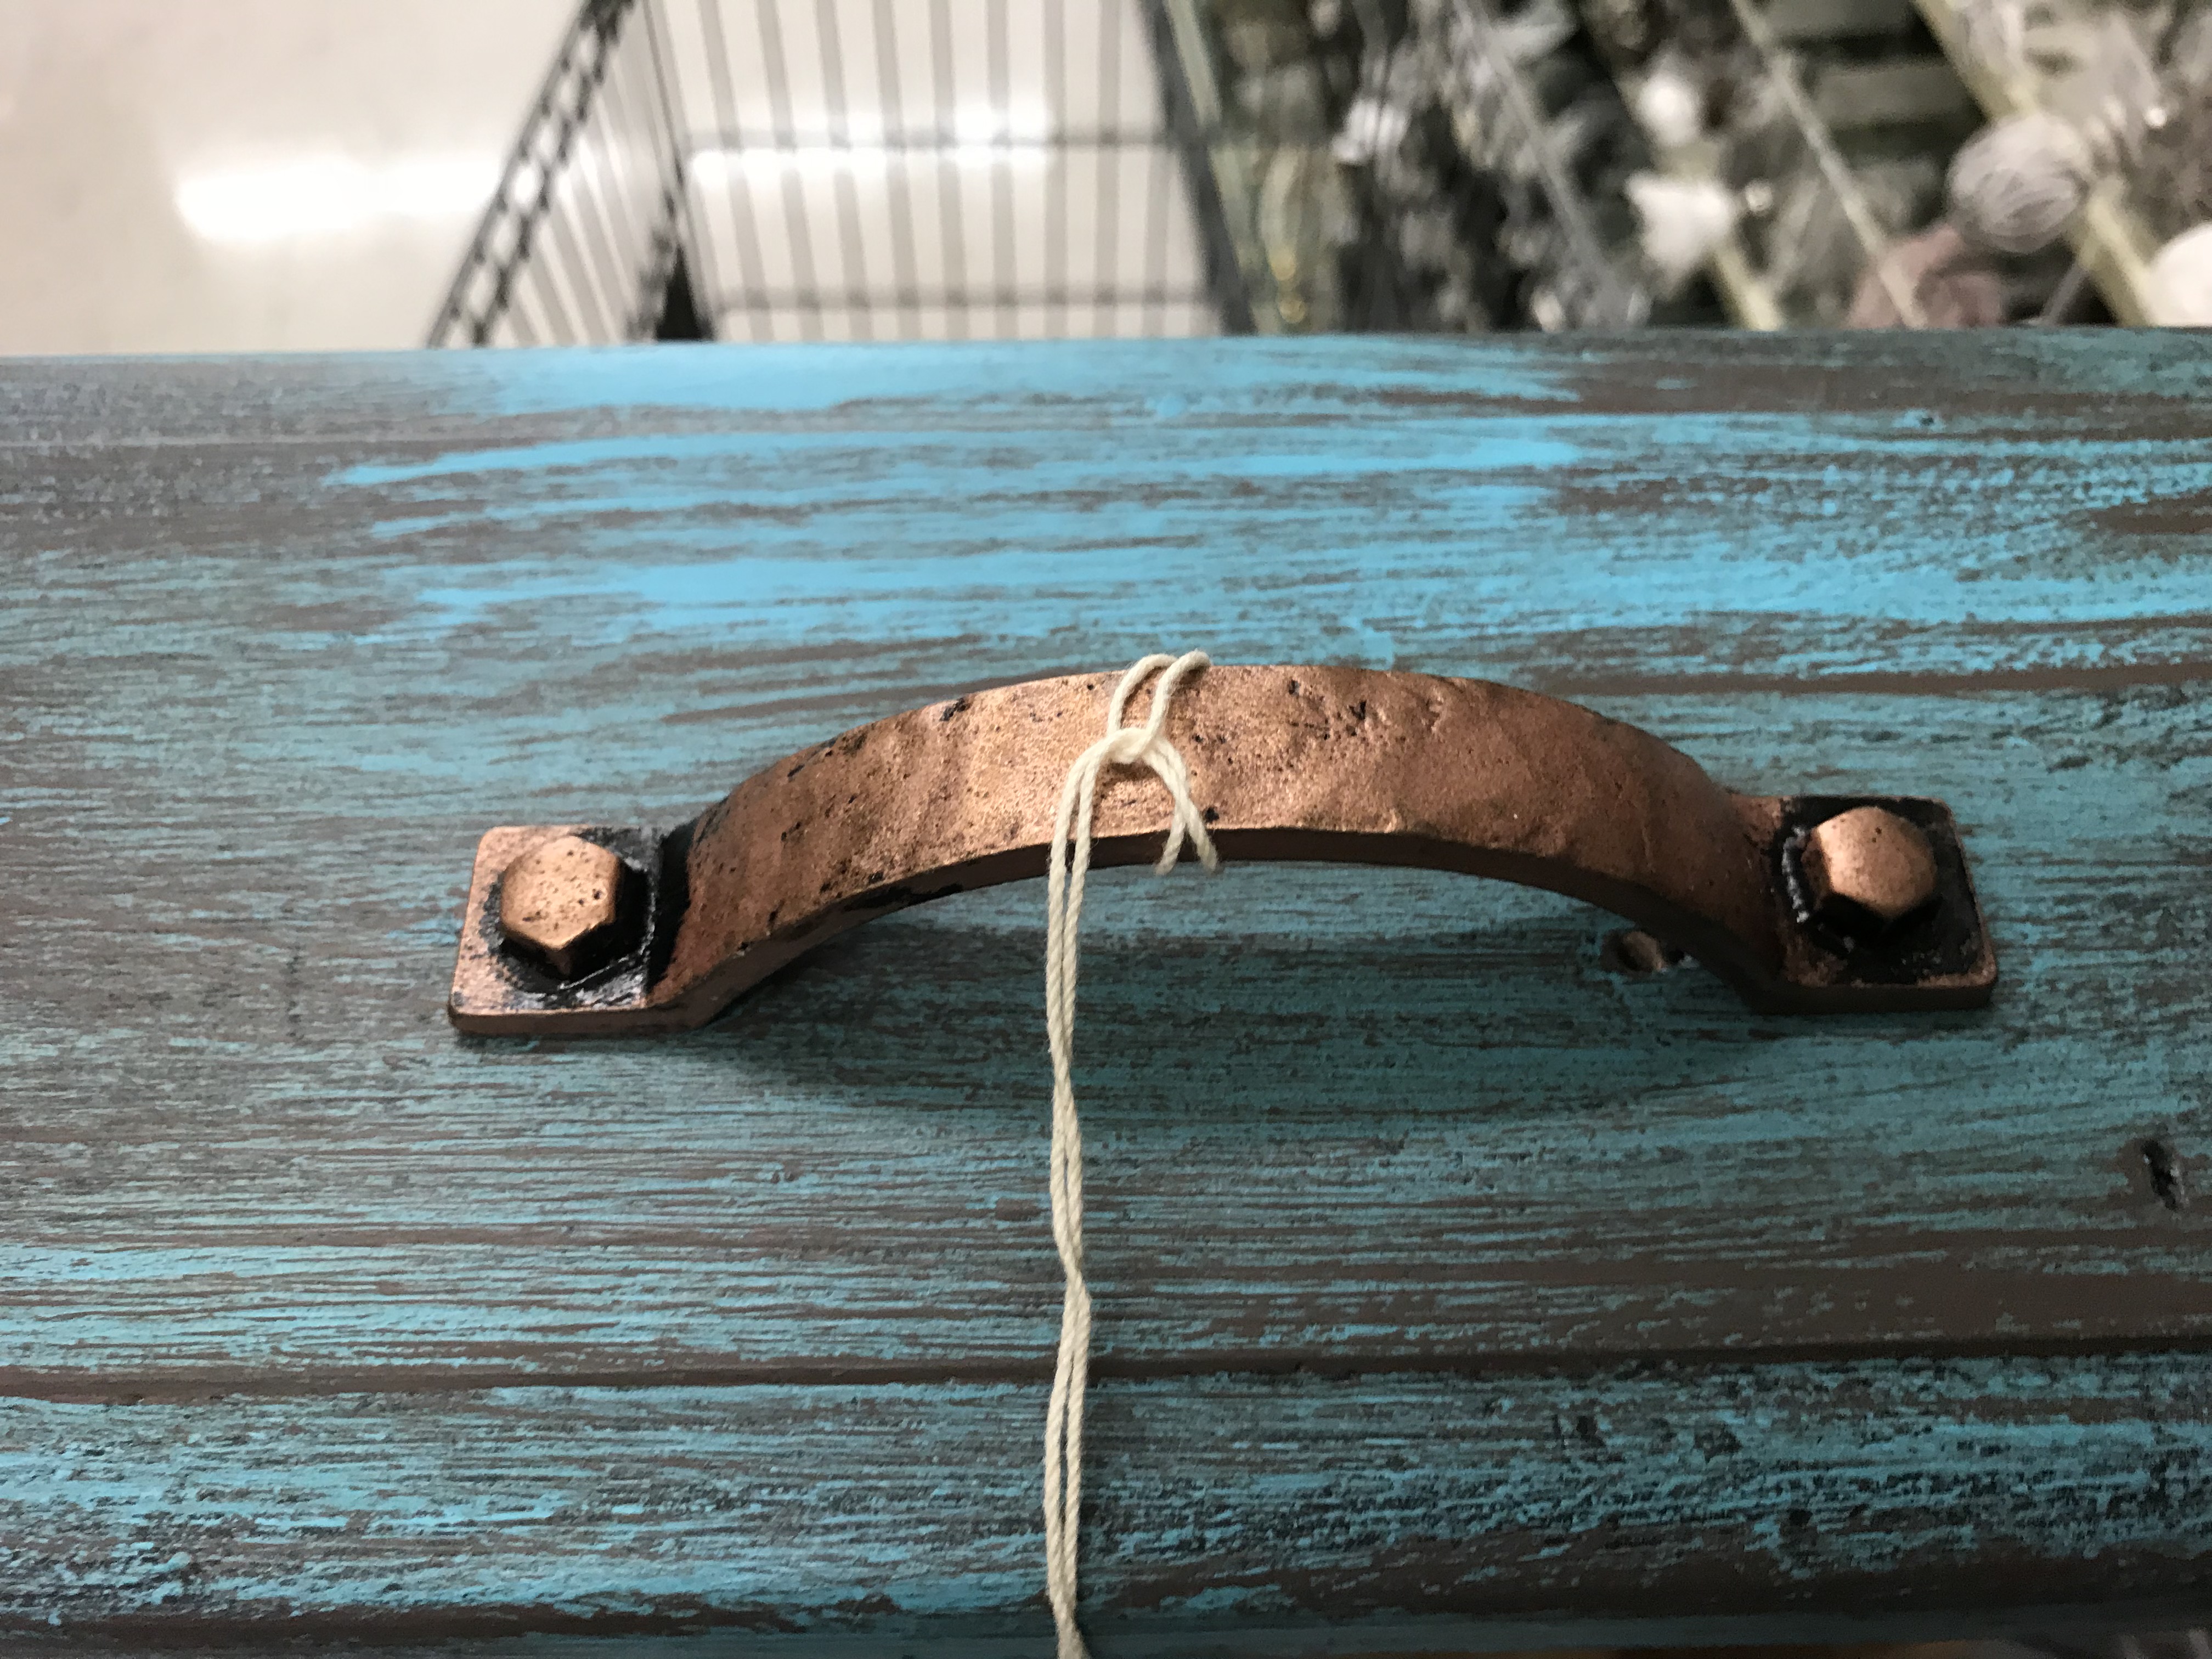
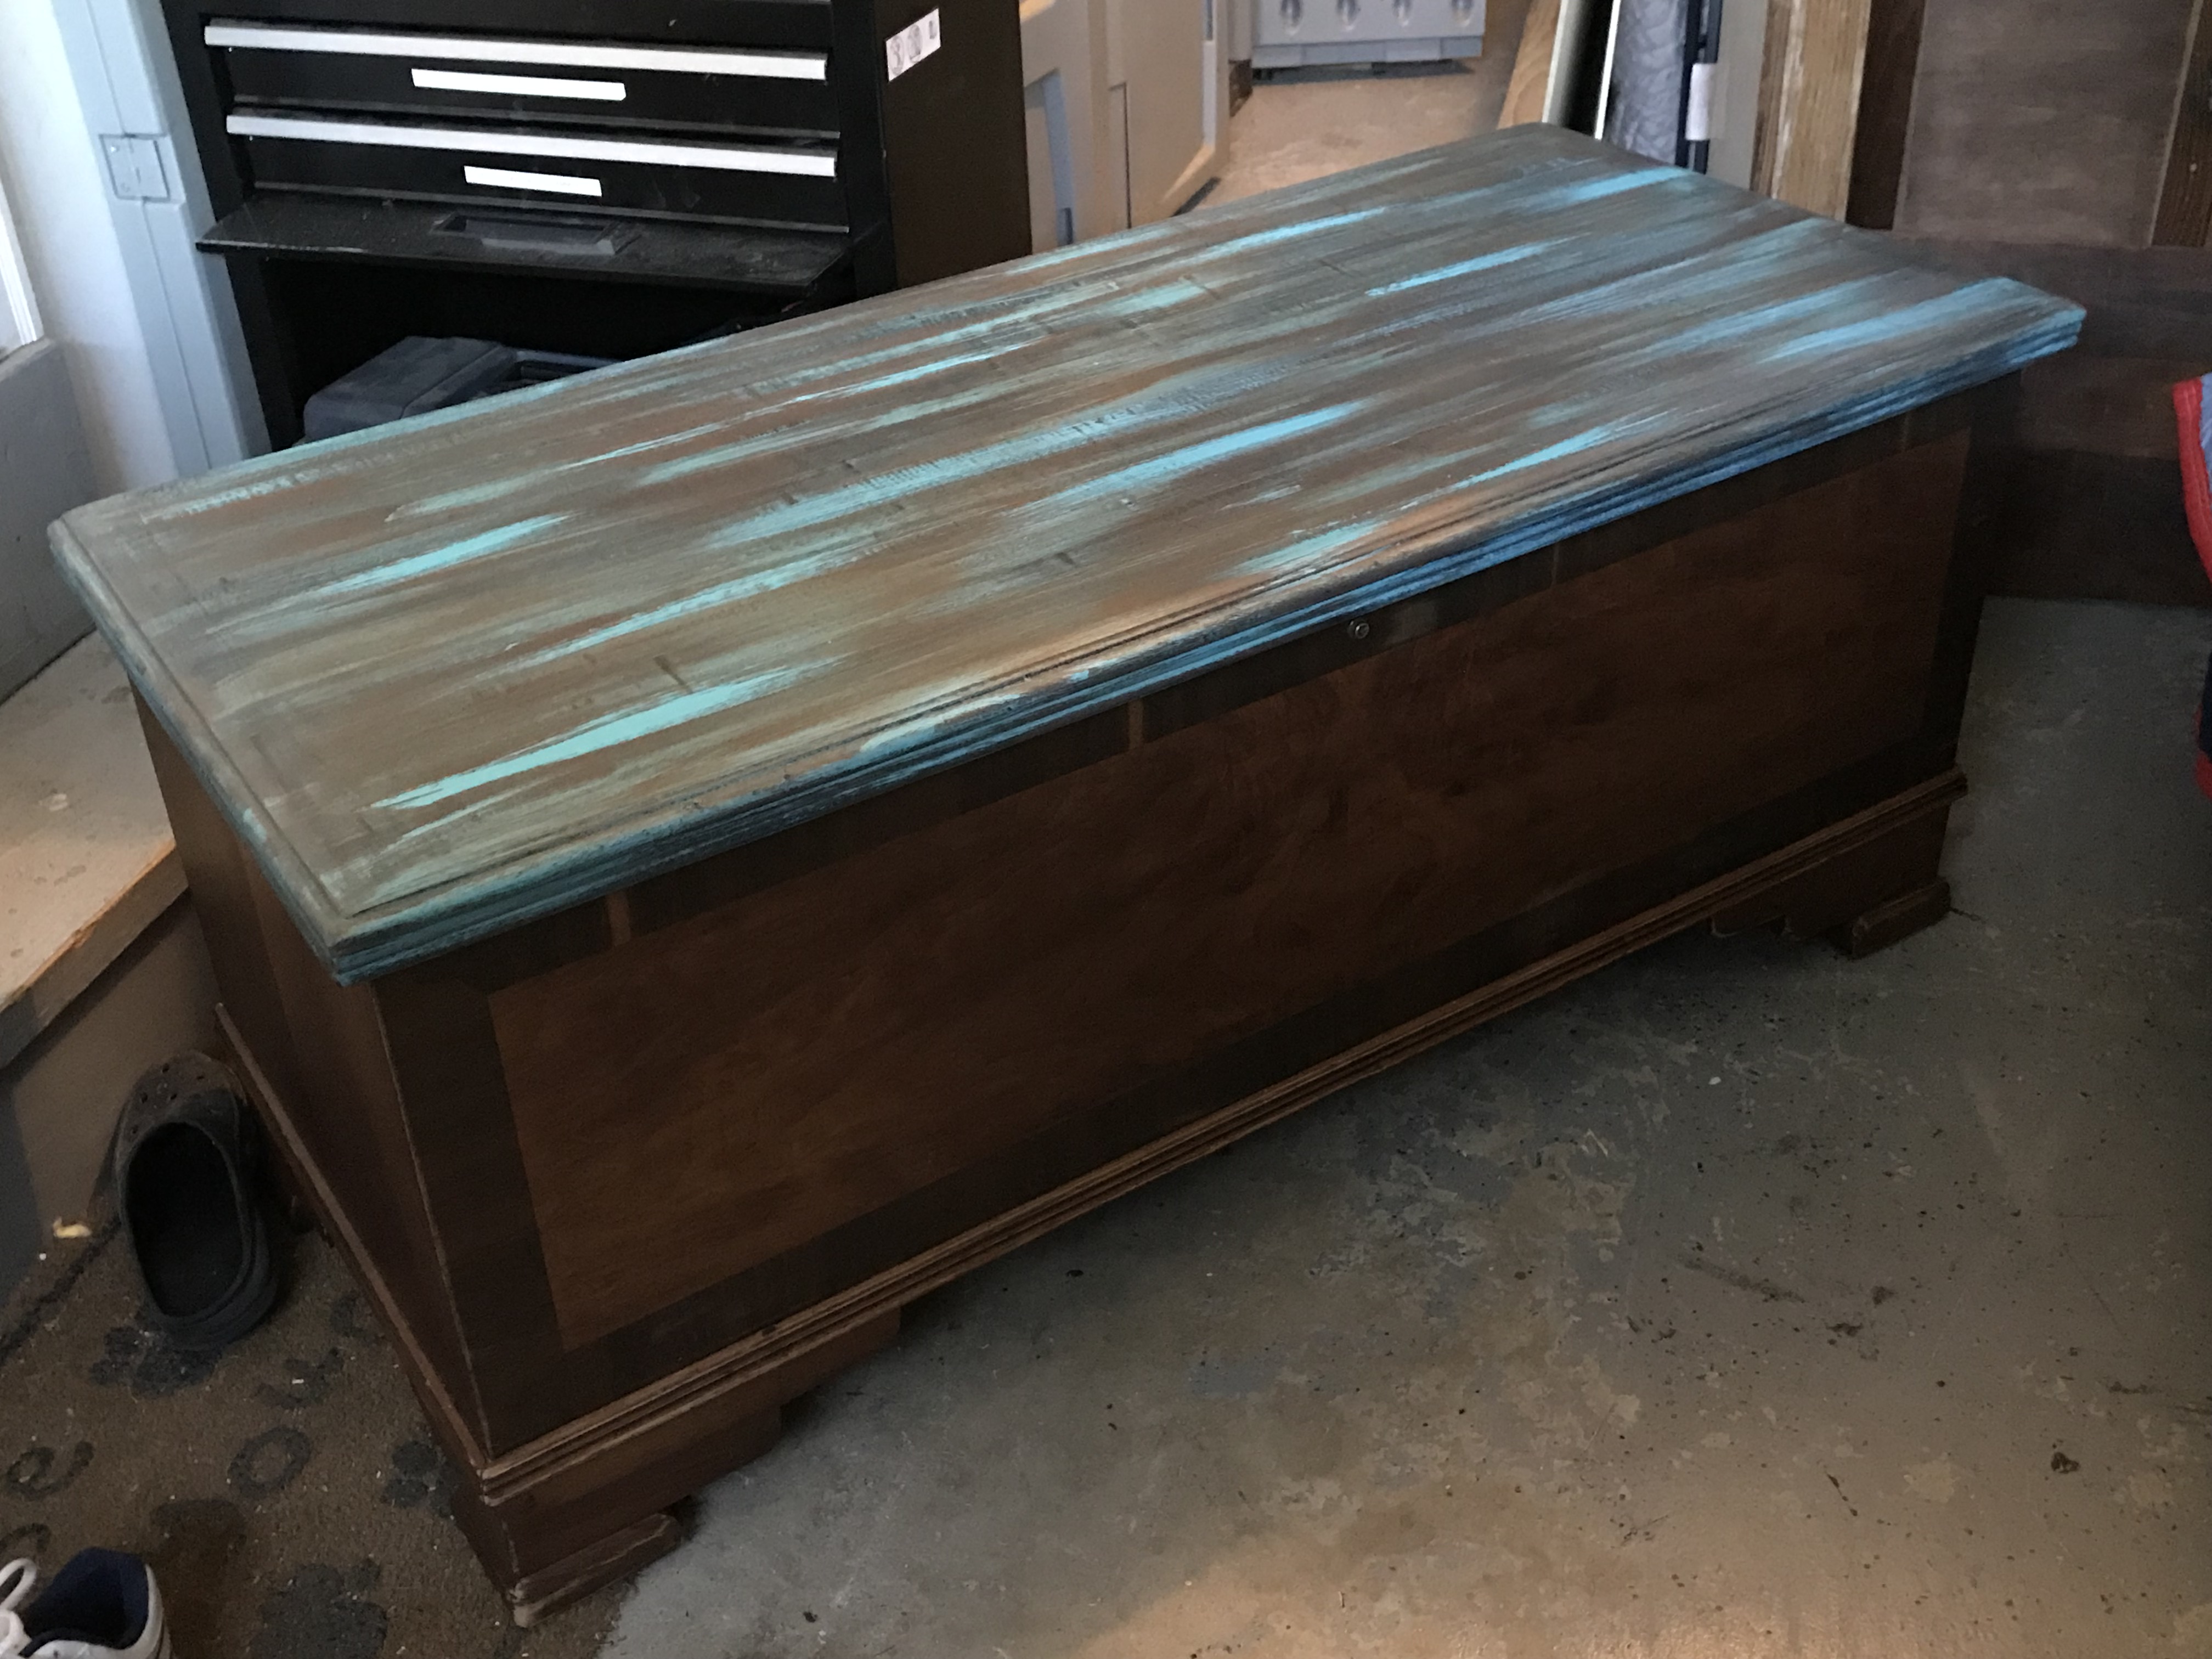
My next challenge was coordinating the cedar chest with the dry sink. The chest had significant damage to the top as the veneer was starting to peel. The rest of the piece was in great condition. It did have a gloss finish that I knew I was going to need to address in order to create the rustic look she was after. I started by removing all loose veneer. As I was peeling it away I noticed solid wood beneath, so rather than attempting to repair it in patches, I removed the entire veneer top. Once I was down to the wood, I used a planer to give it a rough-sawn appearance. Then I used the same techniques to paint the top as I had the dry sink. The uneven finish caught the paint and highlighted the aged look. It was EXACTLY what I was looking for. To finish it off I gave a rough sanding to the remainder of the cedar chest and applied a coat of Flat out Flat finish to it as well. It covered all the sanding marks and removed the gloss finish. The piece looked rustic and worn–the perfect match to the dry sink. 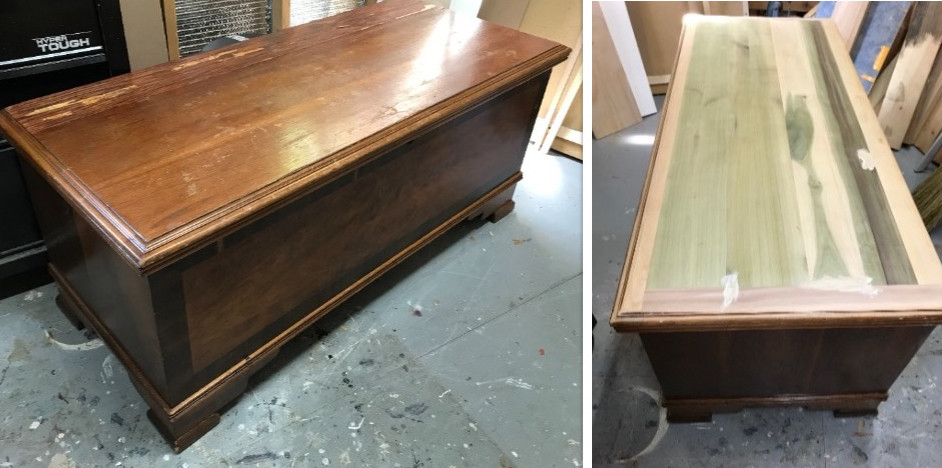
What a spectacular use (reuse) of old, sentimental furniture. It still carries all of the memories and sentiment, but are now a functional part of this family’s home.
Hold my wine, I’ve got this…
Amy
If you enjoy these posts, please like, share or comment. If you would like to receive my blog posts via email, you can sign up here.
1 thought on “Dry Sink and Cedar Chest Makeover”