
Today I’m going to teach you the method I use to create custom embellishments. It is a great way to add a 3D element to furniture and let me tell you, the sky is the limit when it comes to design.
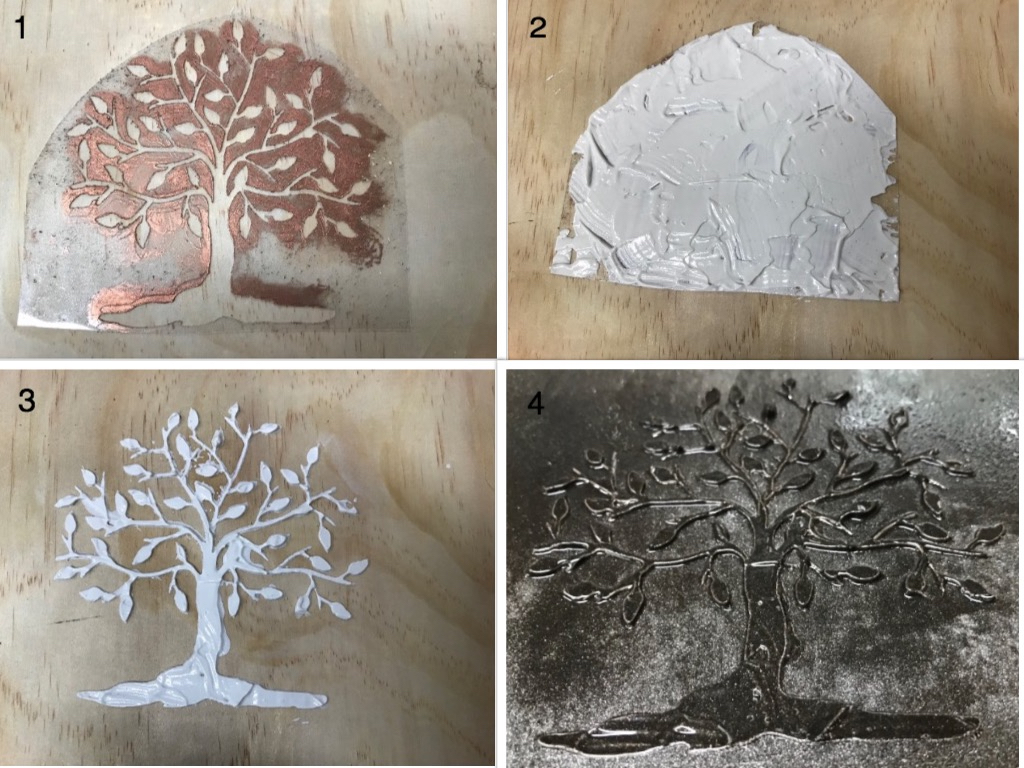
For this tutorial, I’m going to use a Tree of Life design that I recently added to an end table. Make sure you start with a very clean surface, as you want maximum adhesion of your design. I would suggest cleaning the area with TSP to remove all dirt and oils. Next, select your design. You can use pre-made stencils (I recommend using plastic or acrylic vs. paper or vinyl) or create your own using a Cricut or Silhouette machine.
Once your stencil is prepared, apply a light coat of spray adhesive to the back of the stencil and place it in the desired location. Generally speaking, I recommend placing your design in an area of the furniture that will not get heavy wear and tear.
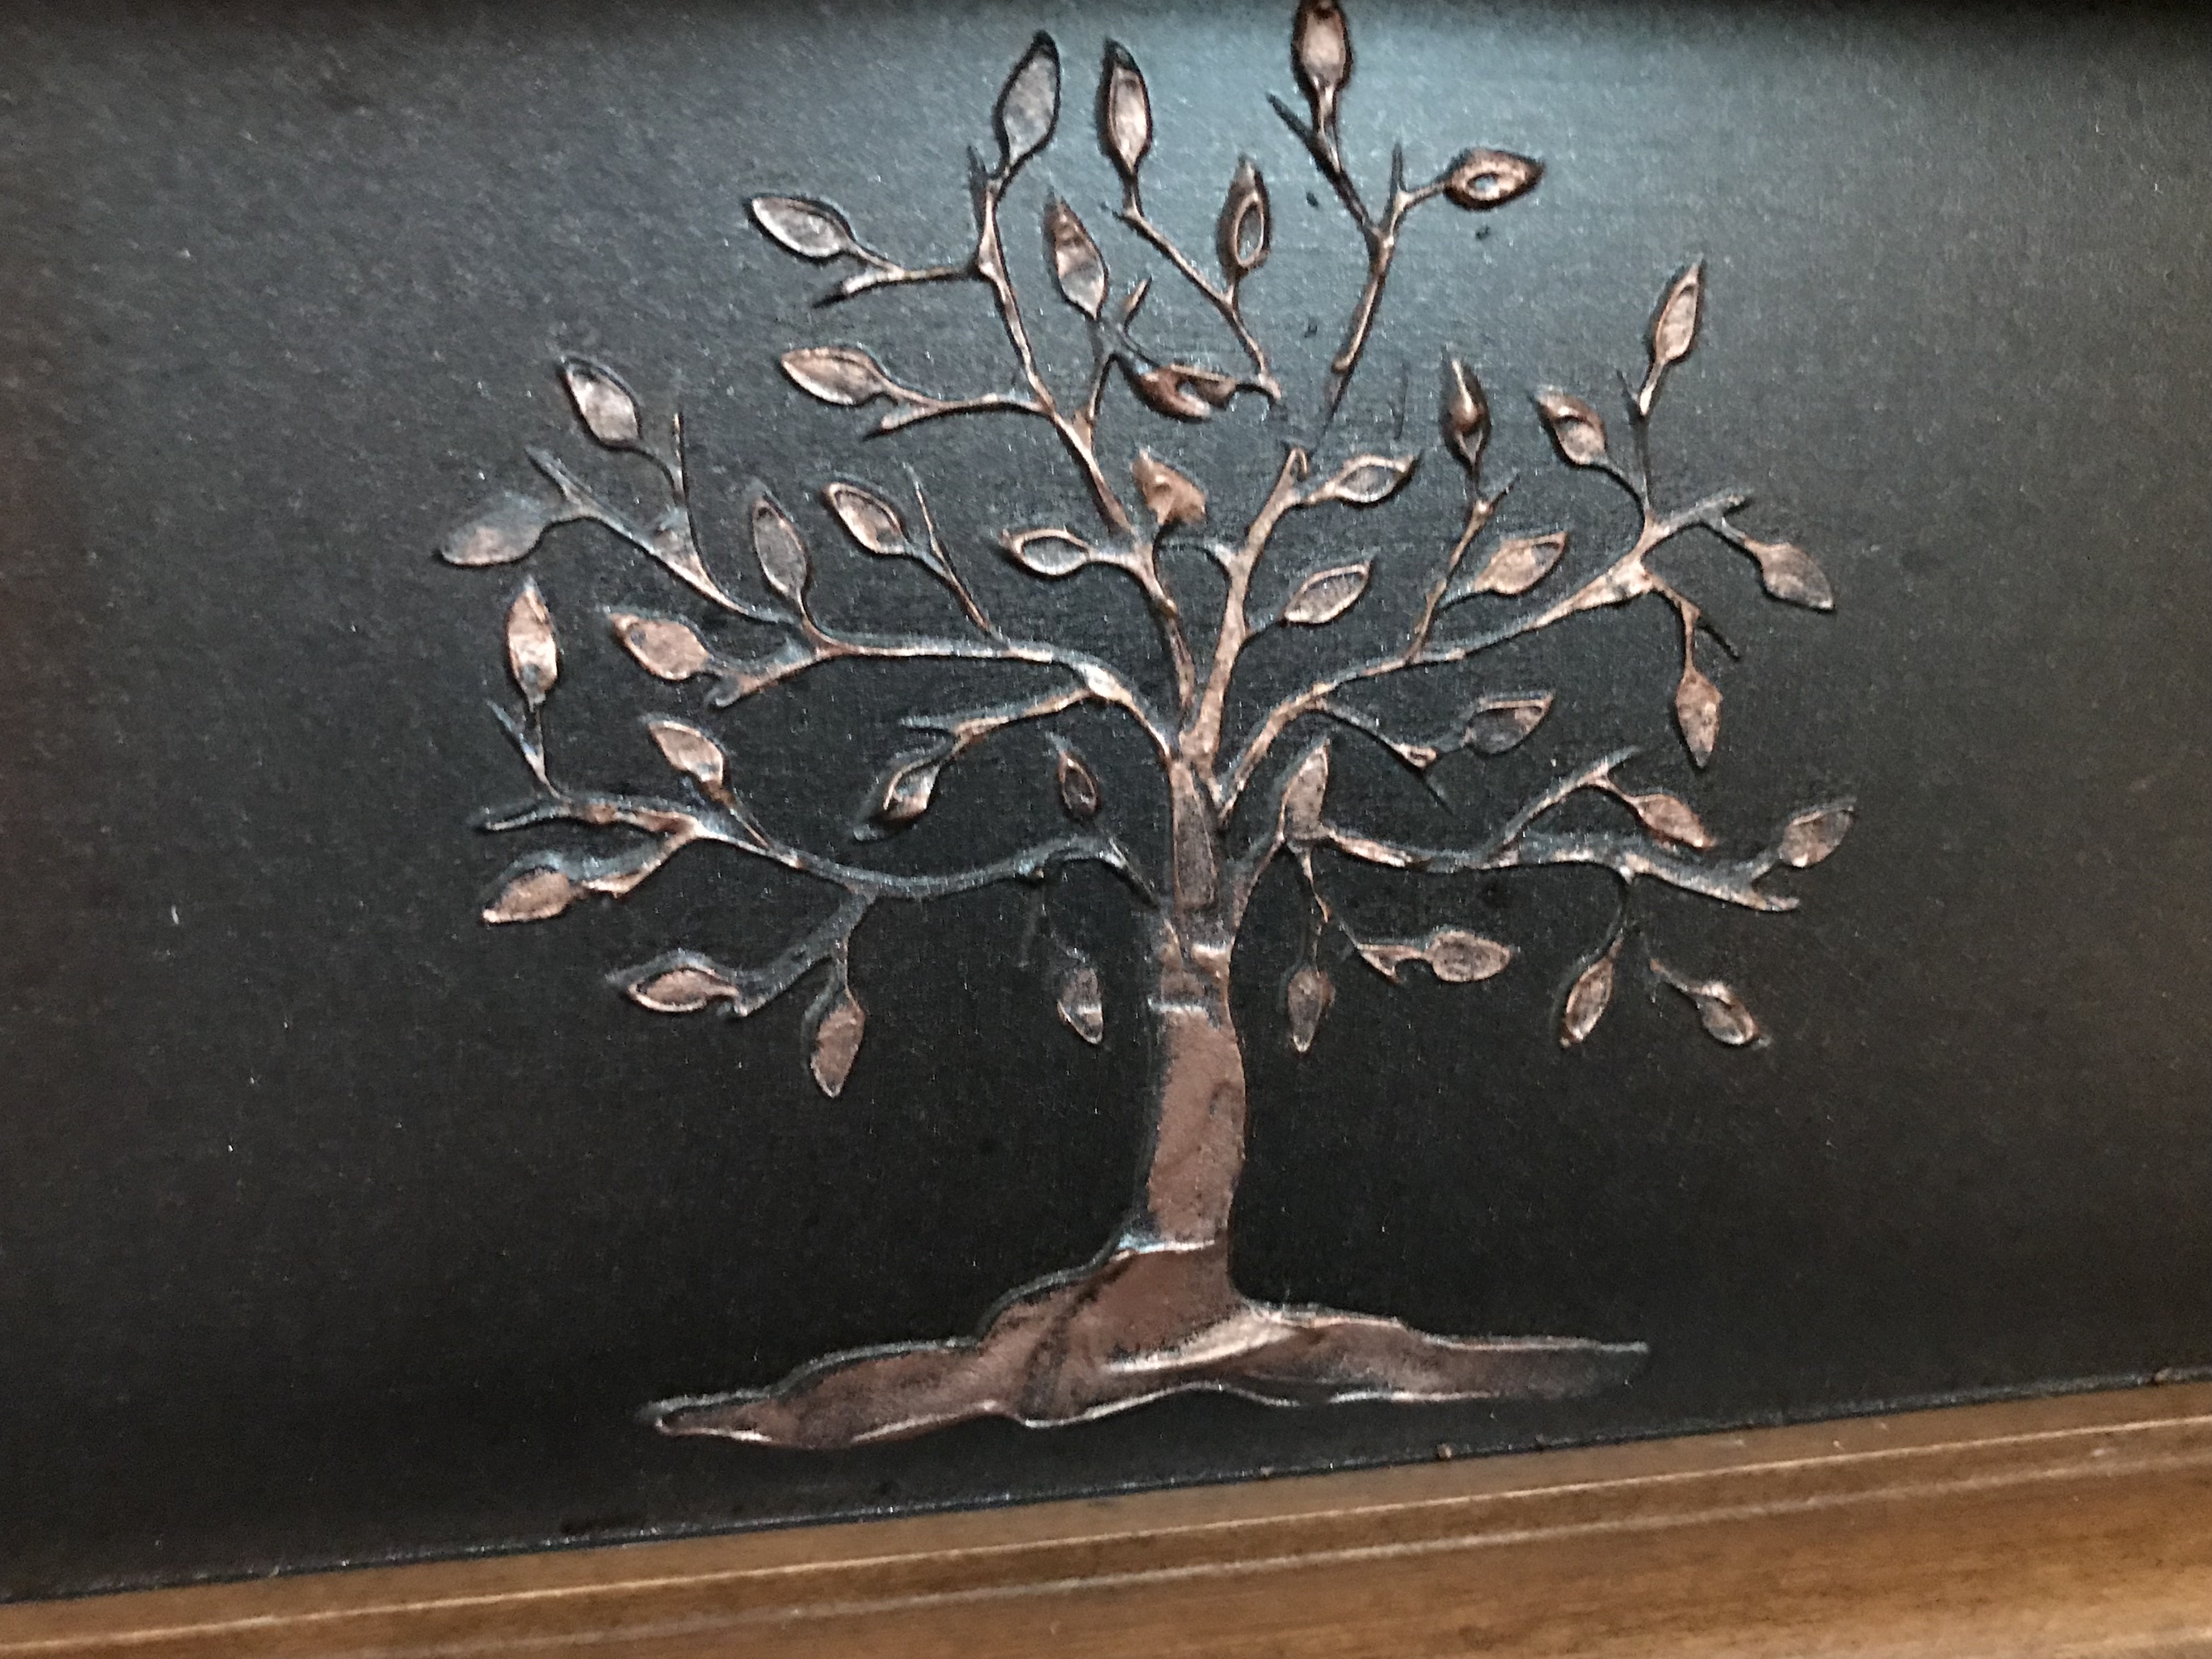
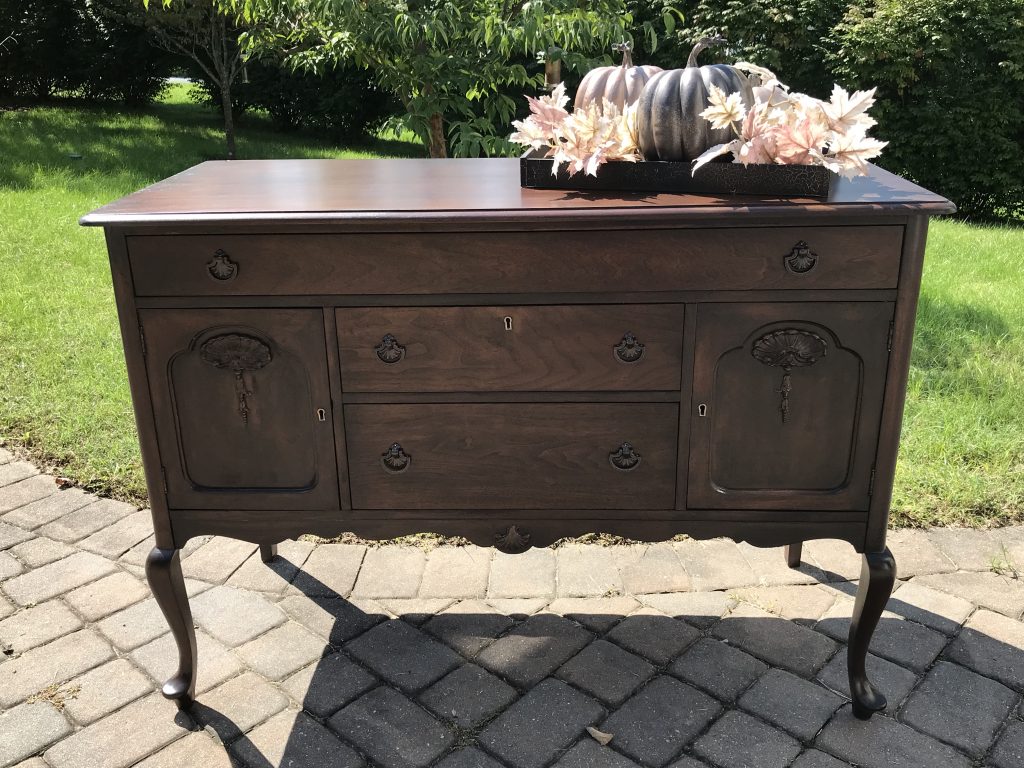
Next comes the fun part! Apply a thick coat of High-Density Modeling Paste. The thicker the coat, the more relief you will get in your finished embellishment. You can experiment with creating a smooth or a textured surface–think of it as icing a cake. When you have an even coat applied and are satisfied with the texture, carefully lift the stencil straight up. What you are left with is a raised embellishment.
Walk away for at least 24 hours. Do not poke it. Do not touch it. Nope–don’t do it! The temptation is almost too much, but you need to leave it alone.
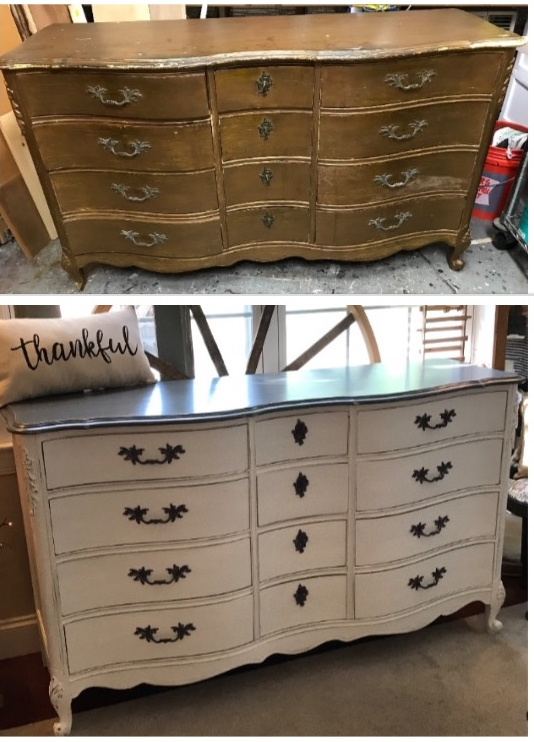
Did you wait 24 hours? If you did, lightly touch the modeling paste to see if it has completely cured. If it has, you can take the next step and paint over your embellishment. In my example, I used a metallic paint to first create a solid color. Next, I went over the raised area with Rub N Buff in Antique Gold (which to me reads a copper) to create a two-toned metallic image.
See, I told you! Easy Peasy! Now I have your wheels turning, don’t I? Just imagine all the design possibilities!
Hold my wine, I’ve got this…
Amy
If you enjoy these posts, please like, share or comment. If you would like to receive my blog posts via email, you can sign up here.
RECENT POSTS:
https://amysupcycles.com/2018/10/09/the-cabinet-that-does-everything/

https://amysupcycles.com/2018/10/02/back-to-its-original-glory/
https://amysupcycles.com/2018/09/25/the-right-kind-of-distressed/
1 thought on “Custom Embellishments”