
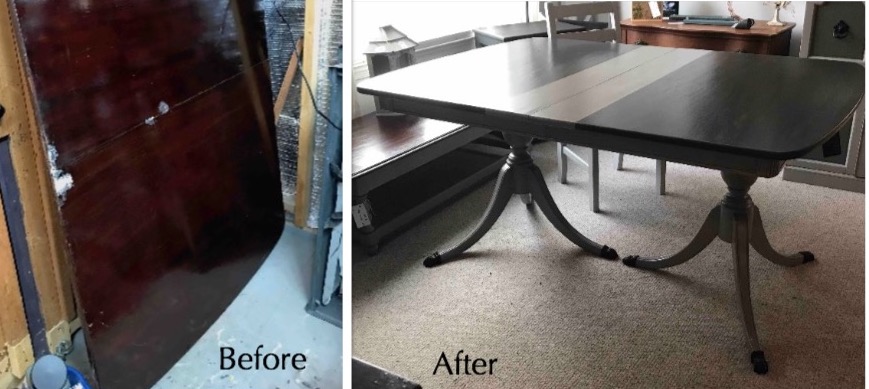
I have decided to try out a new approach to my blog posts. I am showing the before and after pictures side by side for those who enjoy looking at the contrast, but who aren’t necessarily interested in “how the sausage is made”. For those who are interested in the hows and whys, I invite you to read through the details of my post. As time is a precious commodity for all of us, my hope is that this reformatting will appeal to both groups.
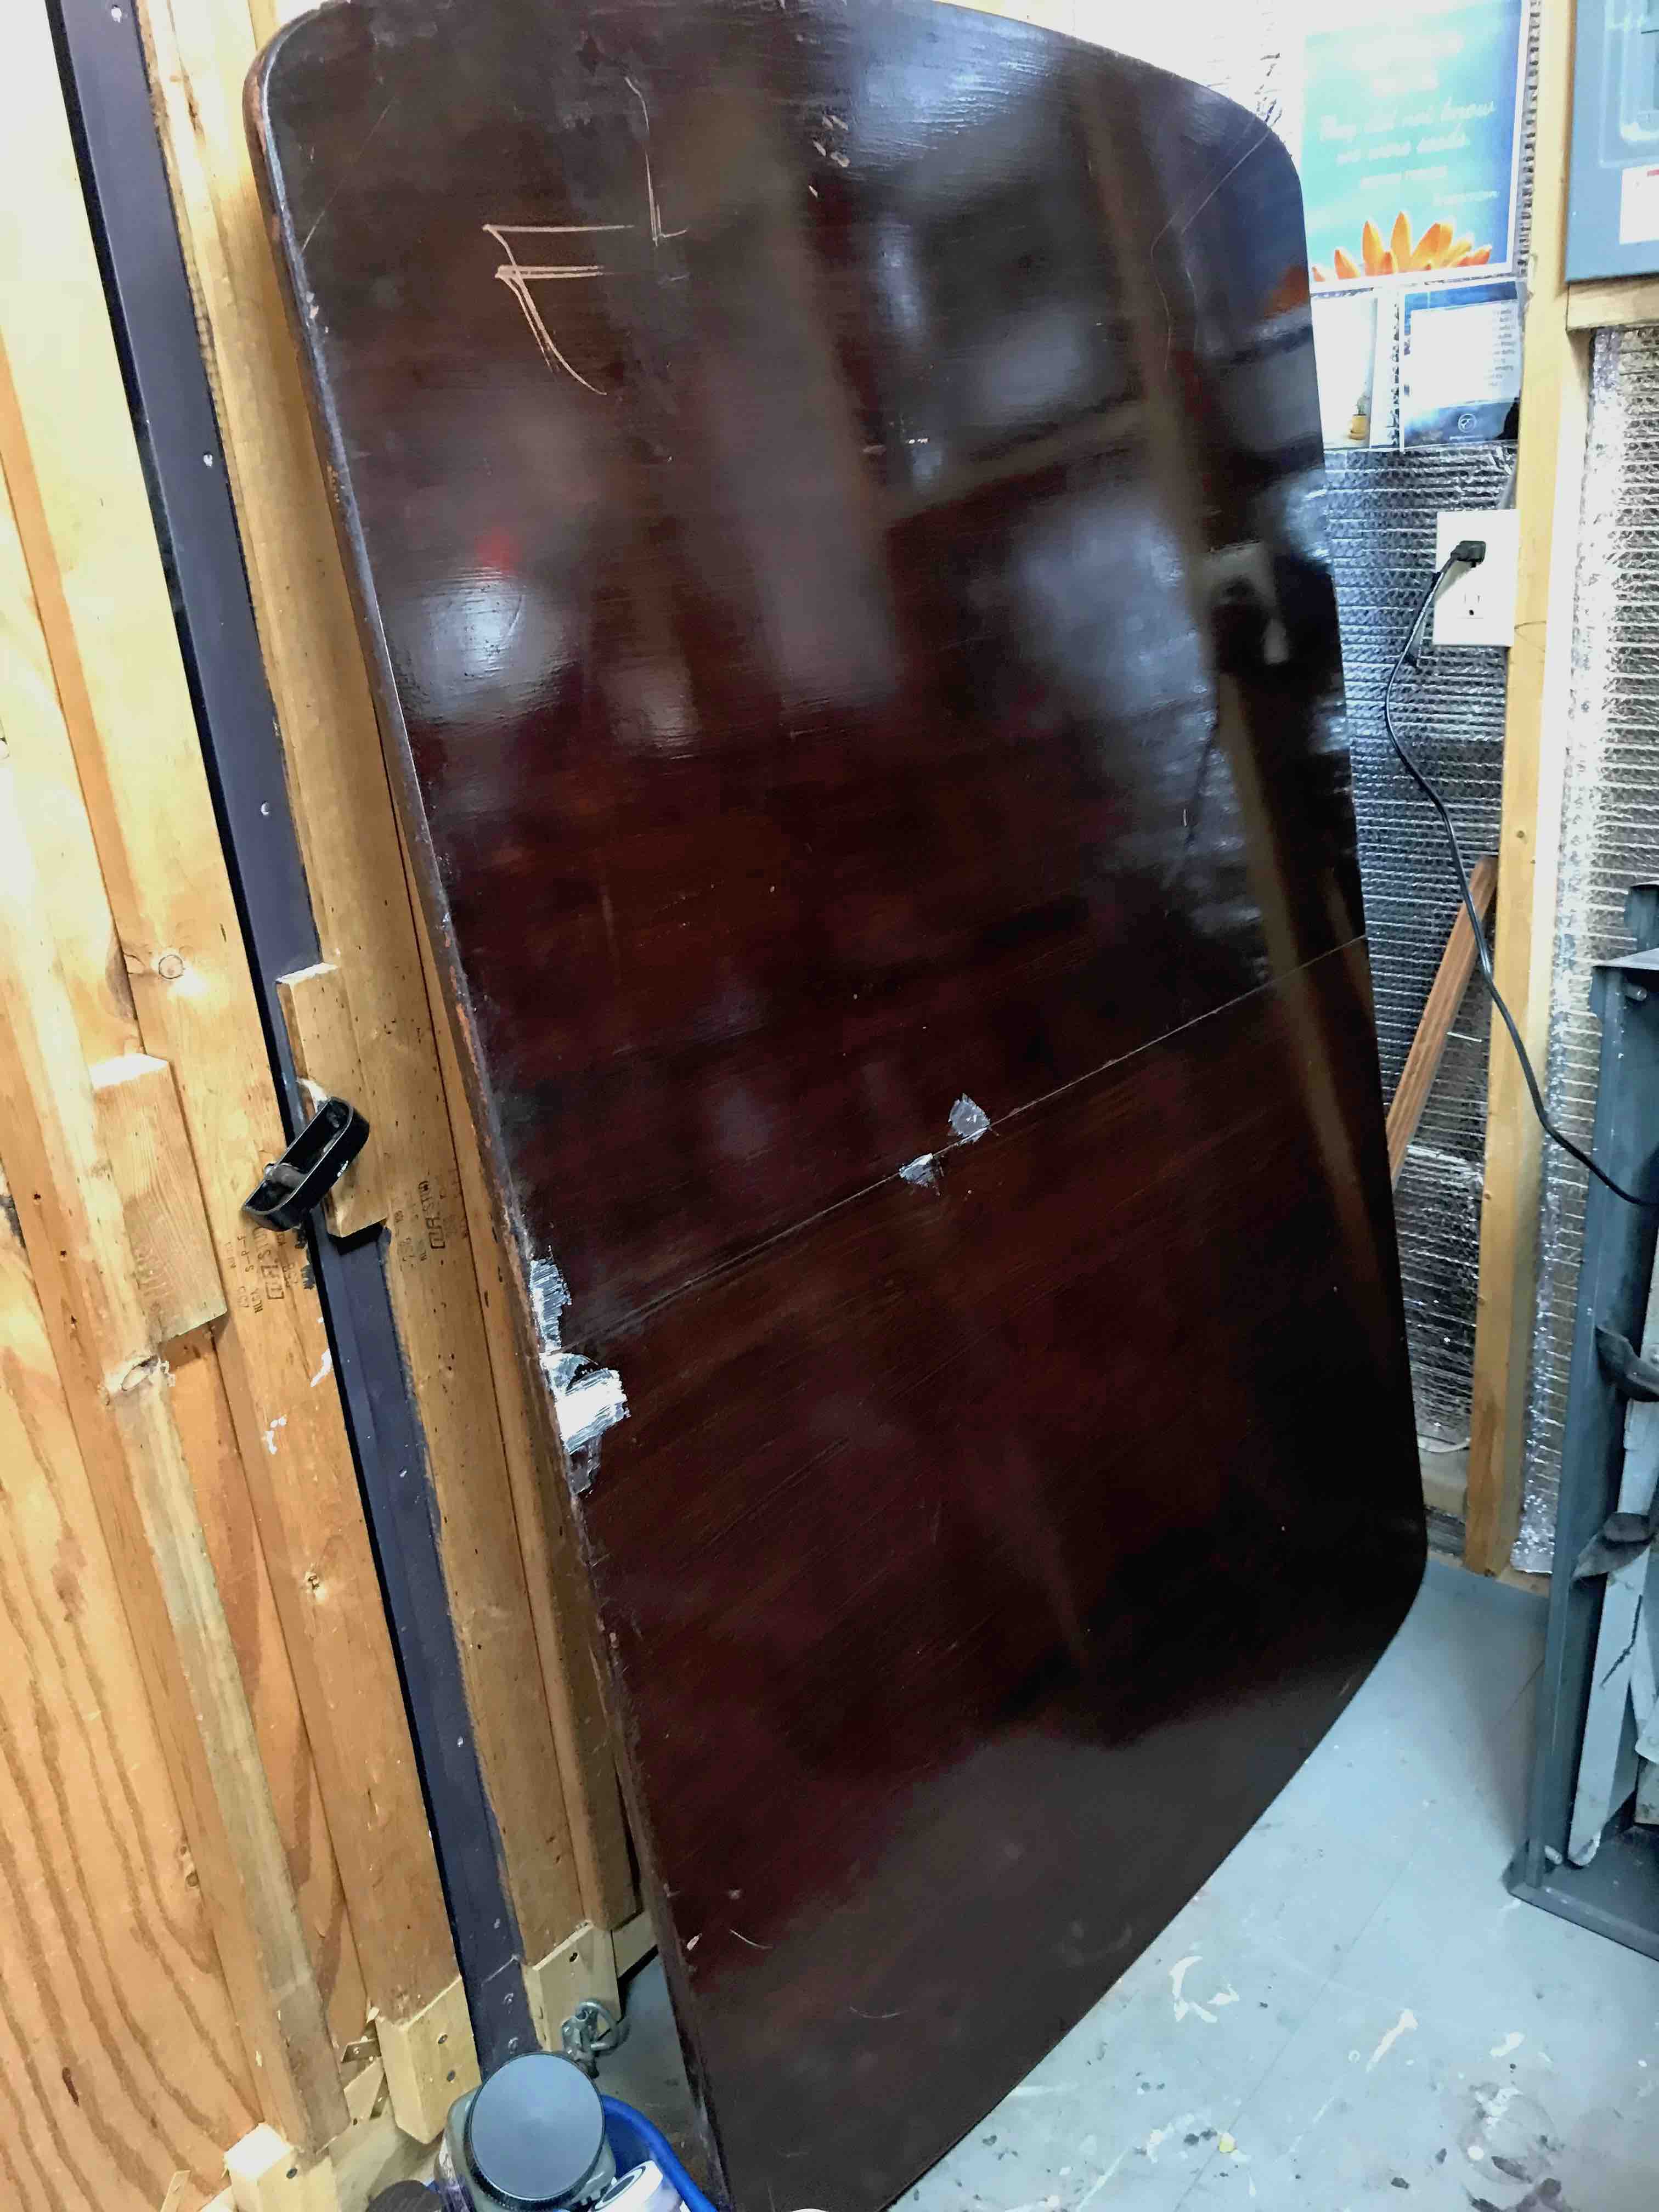
This table came to me in pieces. Literally. Many pieces. The top was deeply scratched, and there was actually a large chunk missing right near the seam. The legs were detached and actually broken into several pieces. To be honest, I wasn’t sure I could make this work.
I started with the legs to see if I could repair them. One of the tripod legs was completely broken off from the pedestal, and I needed to make sure I could repair it so that I could ensure the stability of the table. I used several methods to reattach and reinforce (pegs, glue, and screws) and was able to rebuild the leg. Because I was planning on painting the base, I could countersink the screws and fill the holes.
Once I was sure the legs were solid, I set my attention on the table top. Even though the scratches were very deep, I was pretty sure I could sand them out. It was that chunk missing in the middle that really was ruining my plans! I could repair the damage, but if I wanted to restain the top, the “patch” would be visible. Then it hit me–I would paint a permanent “table runner” across the middle. That way I could still do the repairs, but they would not be visible.
Now that I had a plan, it was time to get to work. I removed the claw feet from the legs and painted them oil rubbed bronze. 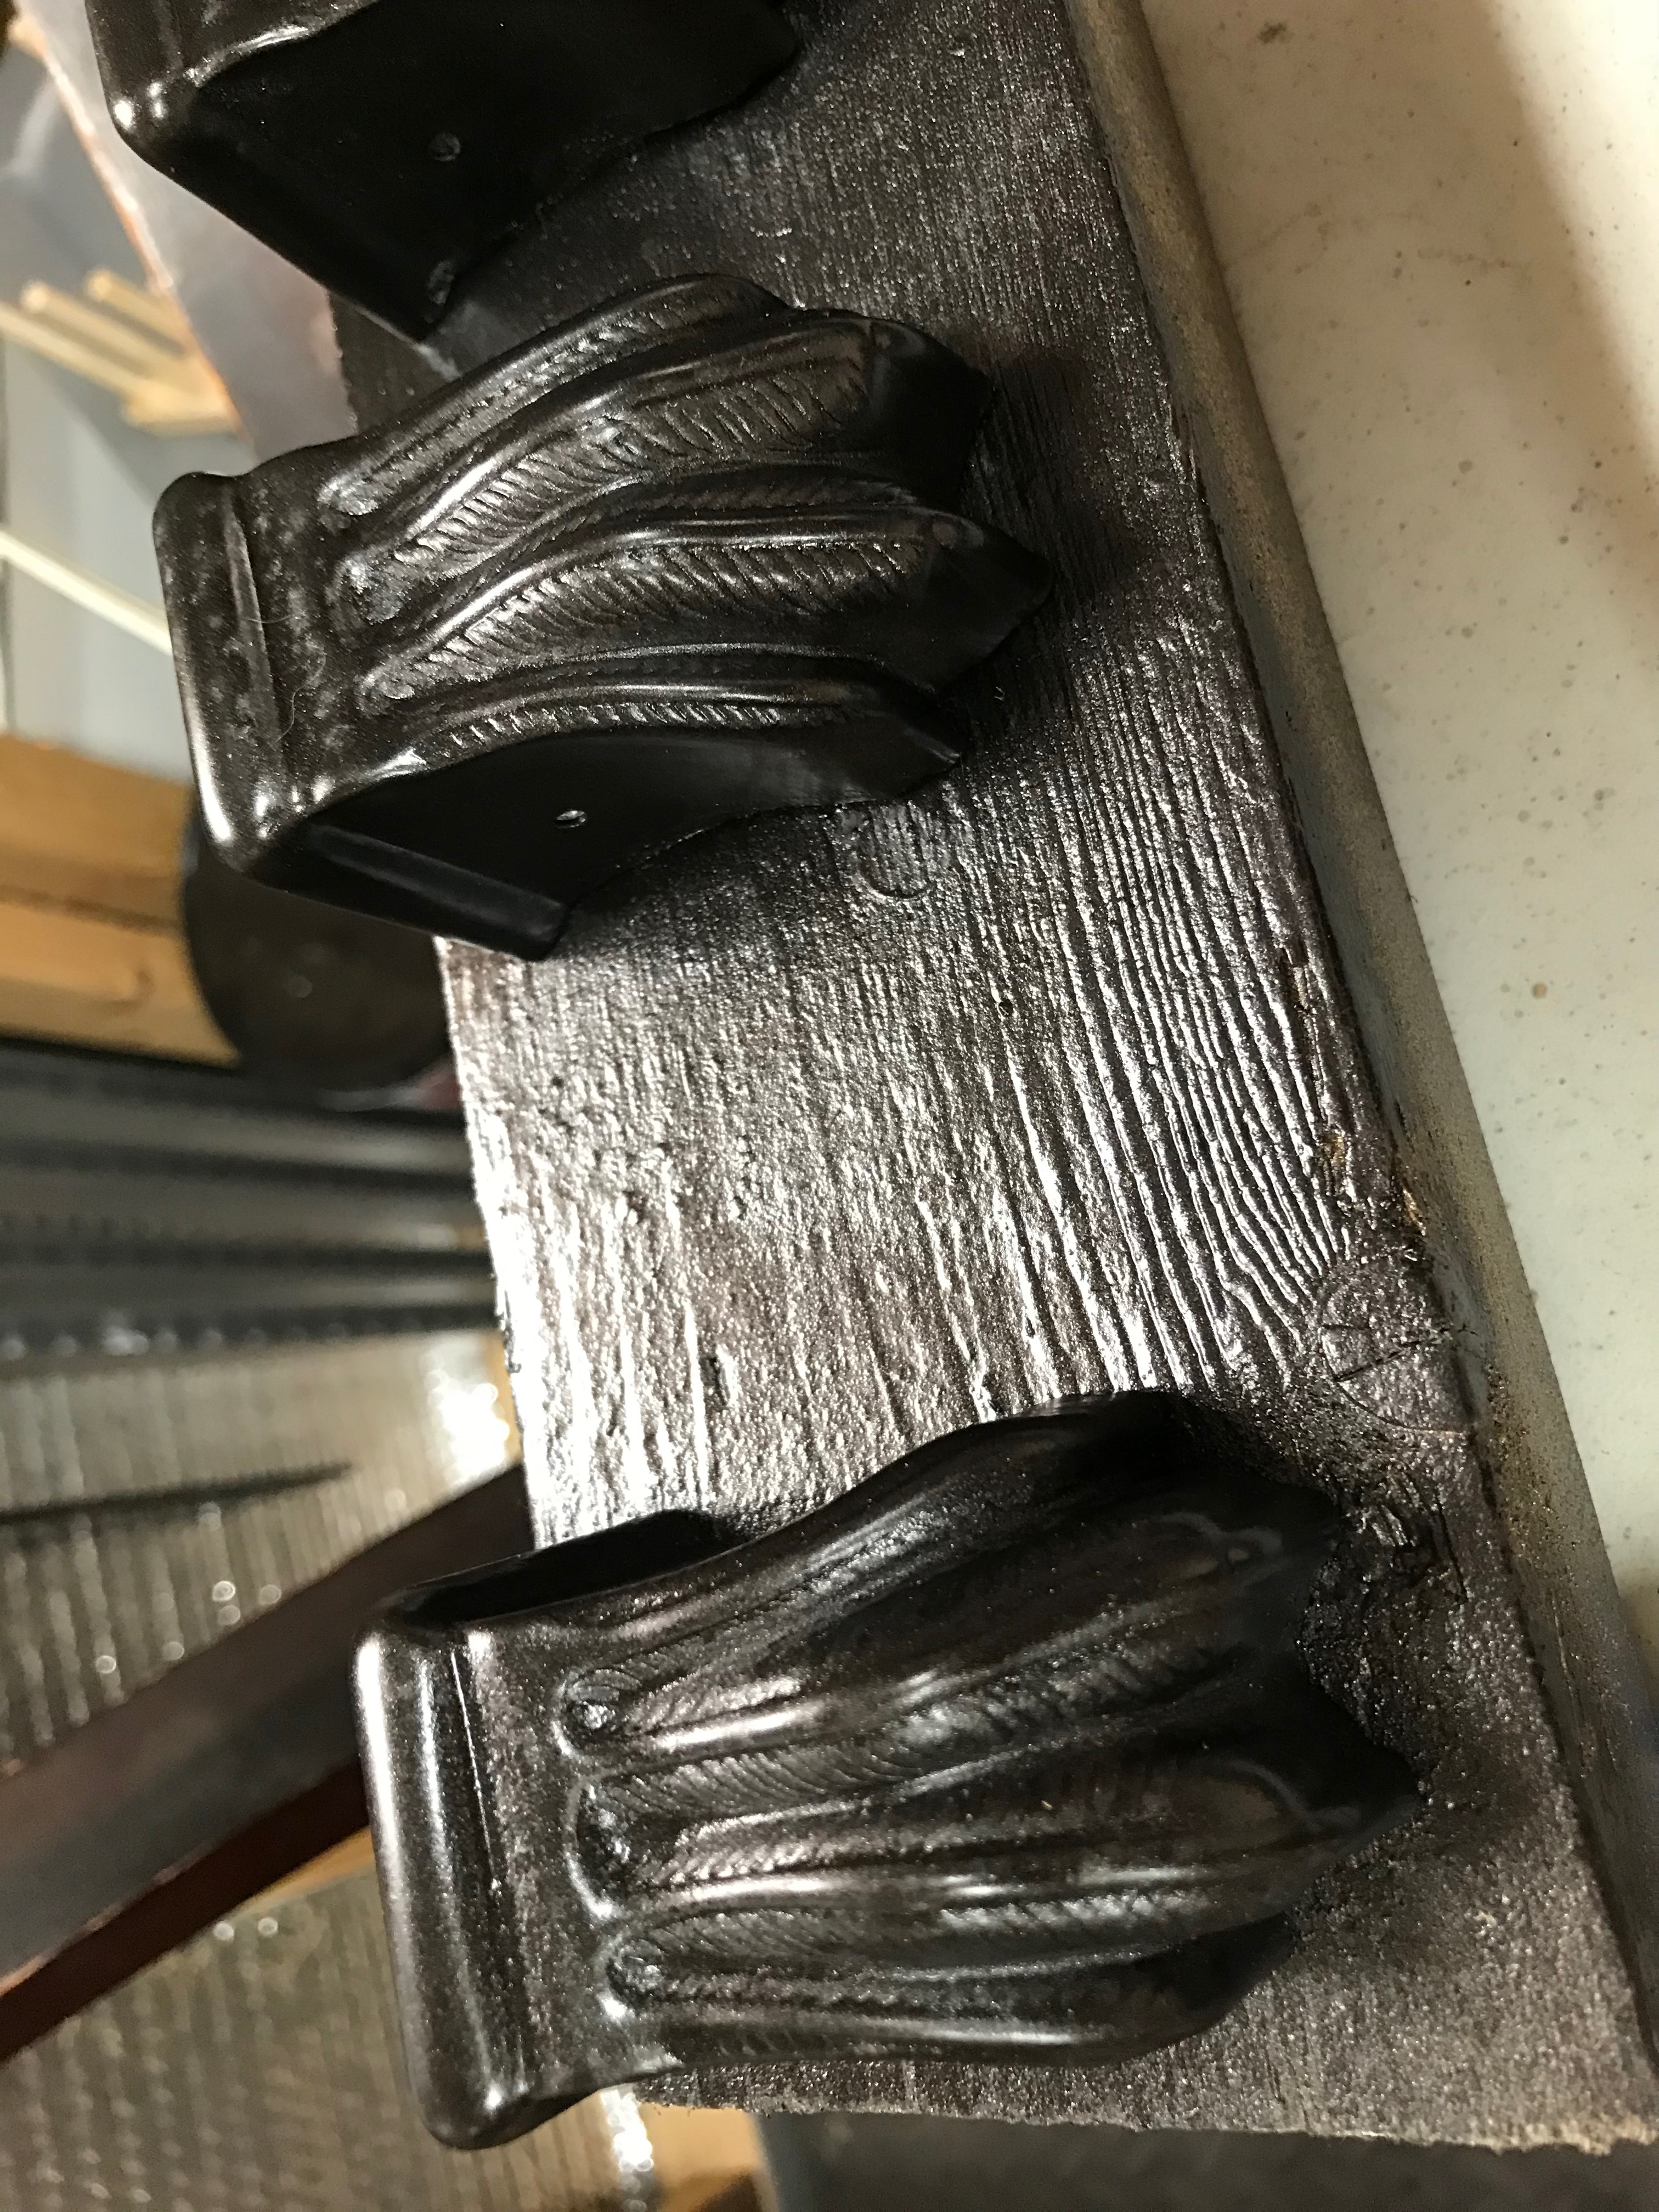

In an instant, they looked as good as new. I chose a neutral paint (Waverly’s Chalk paint in Mineral) for the legs and table runner, with a gray stain (Minwax in Carbon Gray) for the rest of the tabletop. To blend the two finishes, I went over the chalk paint with the gray stain and immediately wiped it off. It created an aged appearance on the paint and helped to blend the color palette.
I followed up with several coats of Polycrylic to seal the finish. Finally, the claw feet were reattached, and the legs were attached to the tabletop.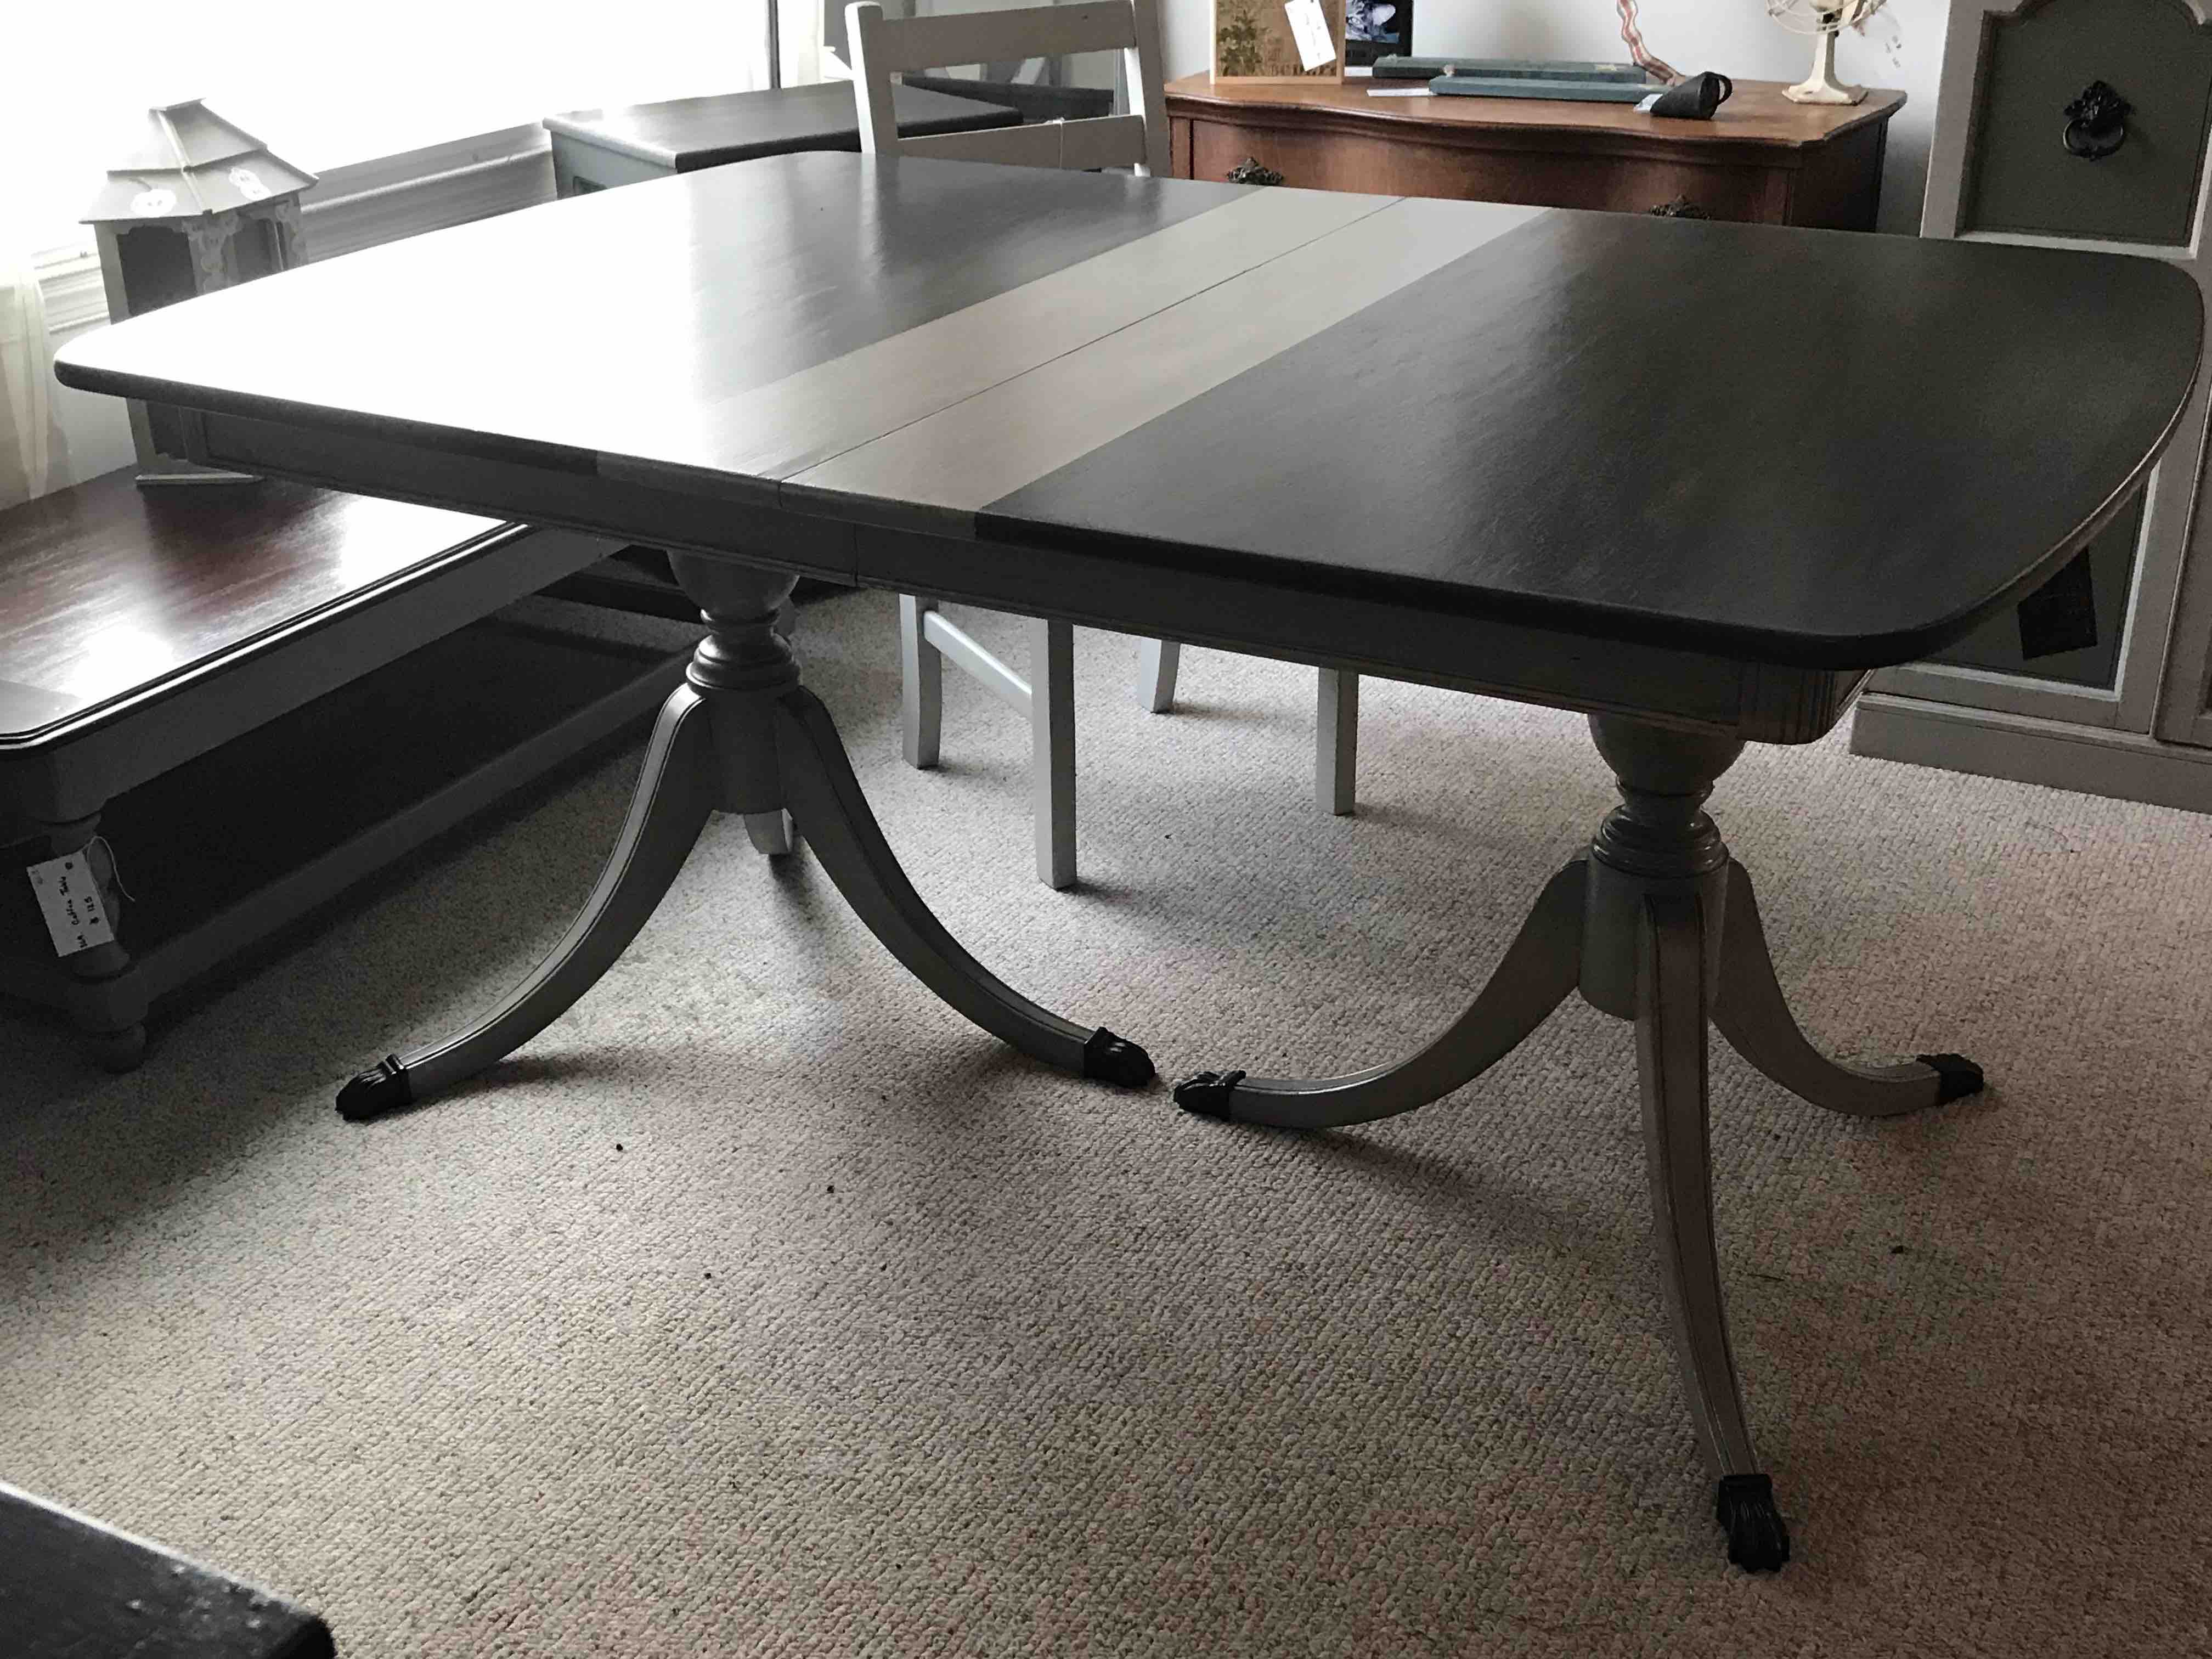
This table has TONS of character with those gorgeous, pedestal legs, but it also has a current vibe thanks to the combination of paint and stain. The color palette is both modern and neutral.
This piece certainly proved to be a challenge. In the end, it got a makeover that will give it a brand new life.
Hold my wine, I’ve got this…
Amy
If you enjoy these posts, please like, share or comment. If you would like to receive my blog posts via email, you can sign up here.